PS #13: Mini Hydroponics

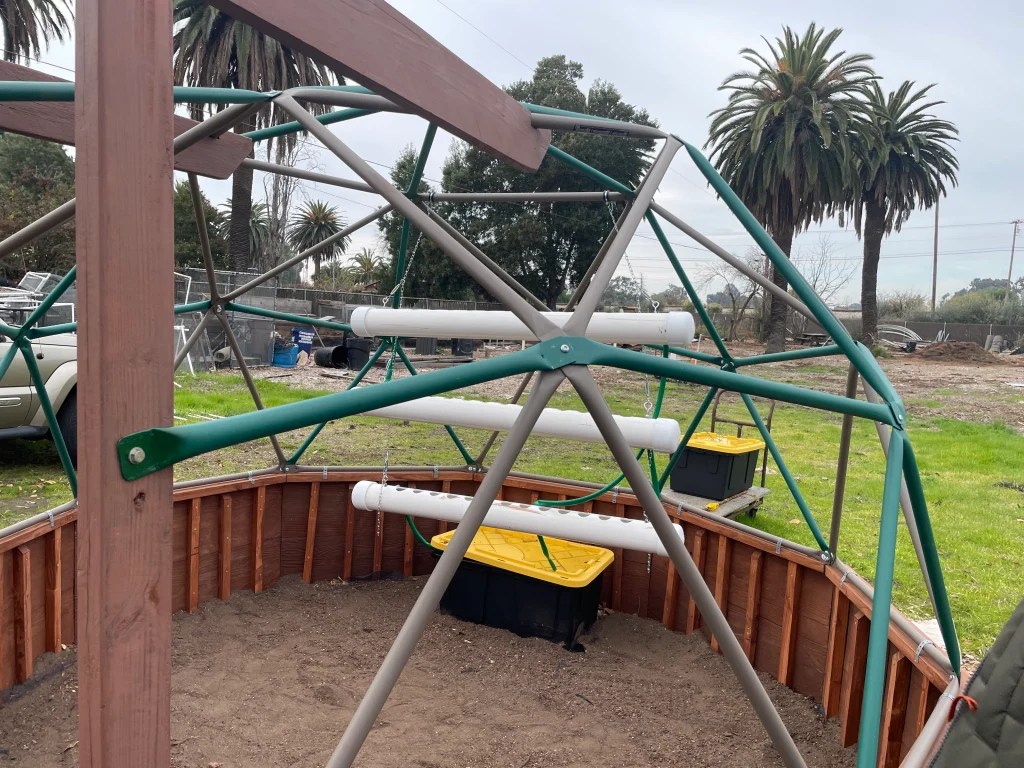
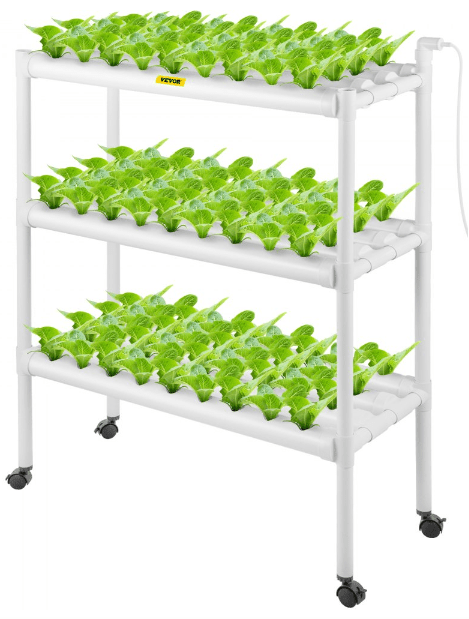
Today, we deepened our understanding of hydroponics by creating a scaled-down version of our hydroponics system. Using smaller PVC pipes with pre-drilled holes, we set out to model the entire system. This allowed us to visualize and analyze the flow of water throughout the entire completed system and how efficiently water would reach each plant within the setup.

Since we had smaller PVC pipes with holes in them, we decided to model the hydroponics system to see how exactly the water would flow and how it would provide water to the plants in the system. After figuring out where all the pieces go, we assembled the system and began running water through it.

By making this model, we gained a much clearer understanding of how the hydroponic worked. We learned about the importance of maintaining a consistent flow rate and ensuring that the holes in the PVC pipes are correctly positioned and sized.

Keep calm and keep growing!
PS #12: Hydroponics Explained

When it came to designing our greenhouse, we had some ambitious goals: to be space-efficient, water-efficient, and energy-efficient. We realized that the best way to achieve these goals was by incorporating hydroponics into our system. Hydroponics isn’t just a trend in modern agriculture; it’s a revolutionary method that aligns with our goals of sustainability and efficiency.

By growing plants without soil, hydroponics allows us to maximize space, allowing us to grow more plants in a smaller area. This method also uses significantly less water than growing plants with soil, as the system recirculates water, conserving it and reducing waste. Additionally, hydroponics systems can be optimized for energy efficiency because the entire system can be run with solar energy. This means all its energy comes from a renewable resource. By incorporating hydroponics into our greenhouse, we are able to create a sustainable and highly efficient growing system that meets all our goals.

Keep calm and keep growing!

PS #11: Completed Hydroponics

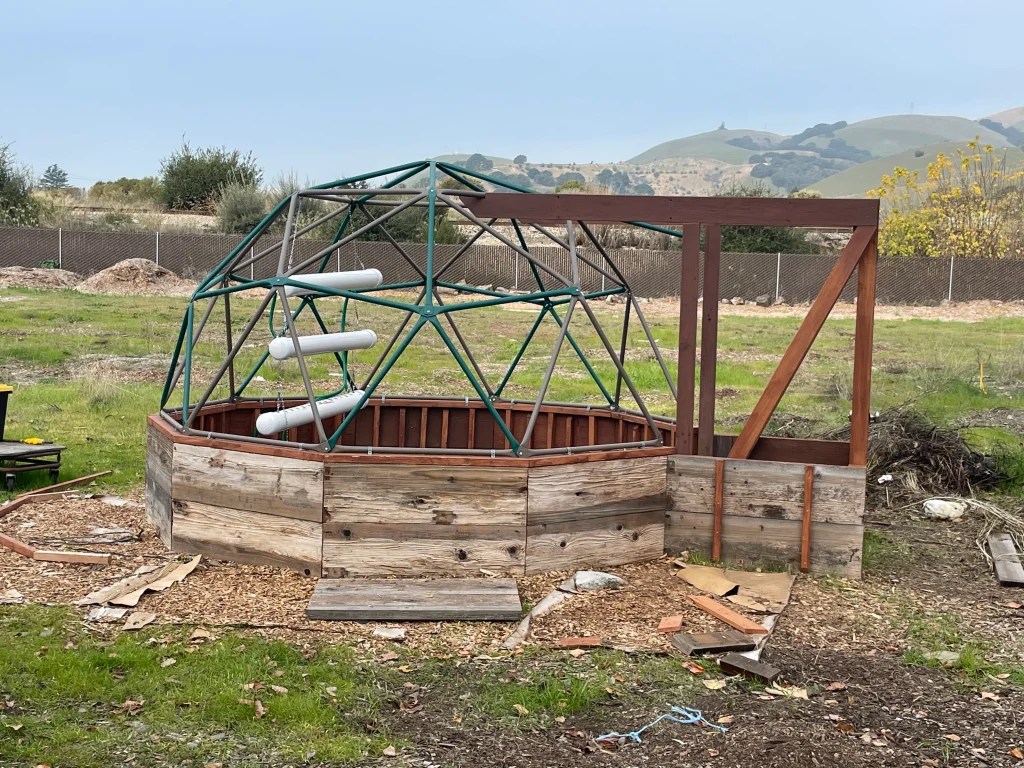
Today, we finished the entire hydroponics system, allowing water to flow seamlessly from the reservoir, through the system, and all the way back to the reservoir. We used the same format as the first pipe to make two other identical pipes. We connected the first pipe with an intake hose attached to the pump, and a second hose which transports water to the second pipe. The second pipe has another hose that transports water to the third pipe after flowing through the second one. The third pipe has a hose that lets water drain from the system and back into the reservoir. However, a problem arose when testing the system for the first time. When the water was getting pumped through the system, the first pipe started to overfill, and no water was going to the second pipe. To fix this, we slightly offset the angle of each pipe so the water was flowing down a downwards slope. Finally, we turned the pump on and water flowed through each pipe and cycled through the entire system successfully.

Keep calm and keep growing!

PS #10: Upgrading The Greenhouse

Today, we focused on furthering the greenhouse, making a proper entrance for it, and starting to put together the hydroponics system. To start, we had to make a doorframe to eventually put to the door in. To achieve this, we used the left over planter box wood and cut it to the measurements of the door. Once the frame was put secured to the dome, we had to secure the door into the frame. We used screws and hinges to attach the door to the frame, successfully making a proper entrance to the dome. Finally, we started the hydroponics system. We used chains to allow the pipes to be hung midair so less material had to be used in the system. To create the pipe we used a PVC pipe, drilled evenly space holes, and glued caps on both sides to keep the water inside. Then, we drilled two smaller holes on the left side and the right side of the pipe, one for intake, and the other to flow water into the next pipe. Finally, we attached the pipe to the chains.

Keep calm and keep growing!

PS #9: Completing the Main Structure

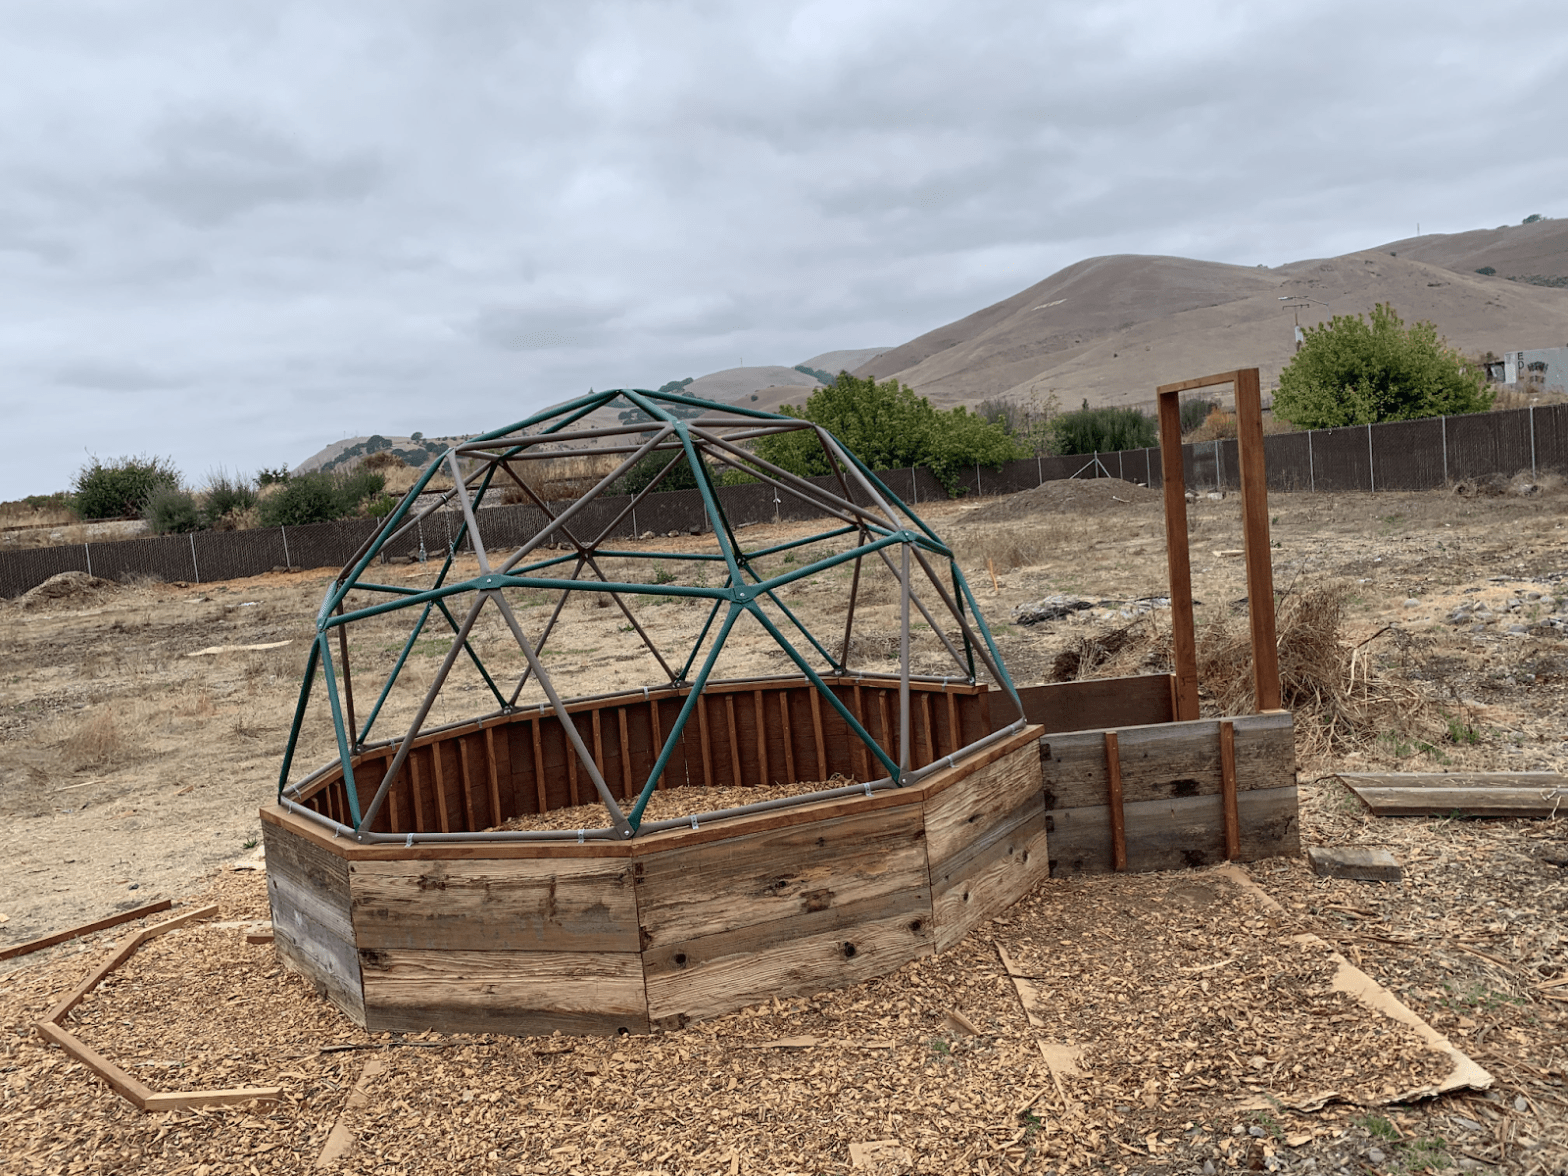
Now that the dome is secured to the inner wall, we needed to trim parts off to make way for the entrance. We essentially removed the pipes that were above the 10th edge of the dome up to the top pipes, which we didn’t touch. Since we were going to append a rectangular corridor to a geodesic dome, we cut some of the connecting pipes to fit.

At the same time, we had a group working on the door frame. We measured out the dimensions of the door and gave a slight gap for the inside measurement of the frame. We also cut out a large roof piece that attaches to the frame and rests on the dome, a horizontal support at the end of the corridor, and a diagonal support for each side.

Once all of these were screwed in place, the structure was sound and we could install the door too. We needed two people, one inside and one outside, to hold the door up as it hovers above the frame, while another person screwed it to the door hinge. With all of this work, the main structure of the greenhouse was done.

Grow with the flow!

PS #8: How we Modeled the Inner Wall

Before we could get started on the inner wall, we needed to have a theoretical model to plan our pieces.

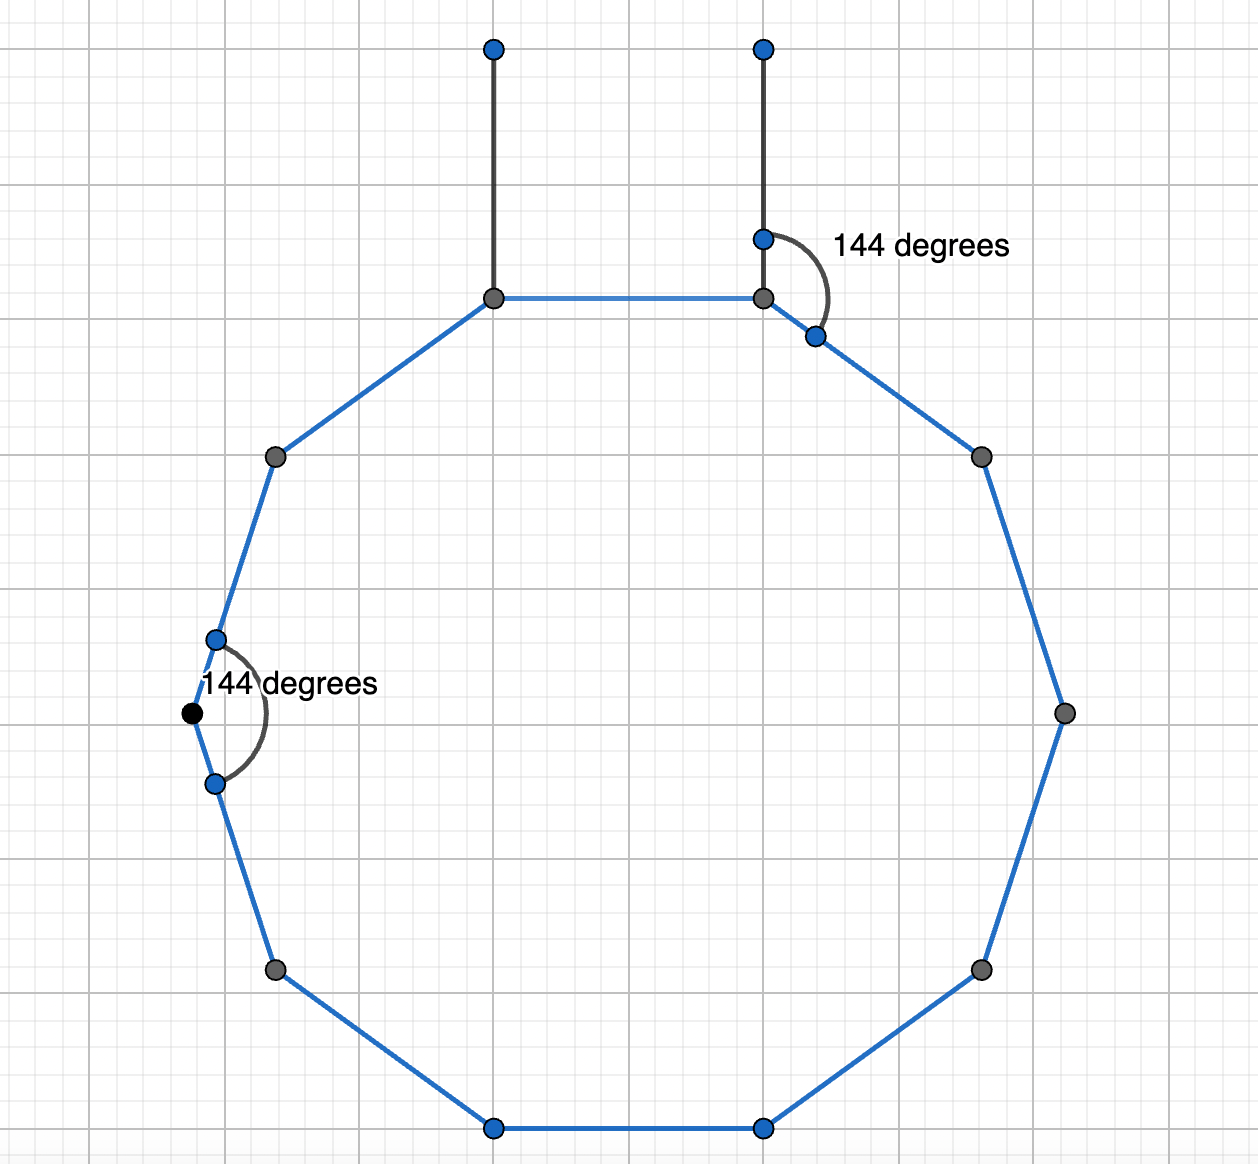
The dome that we chose had 10 edges for the base. This ten-sided shape is a simple decagon and what the wall has to conform to. The amount of degrees in a regular polygon is equal to the product of 180 and the number of edges minus 2 and the interior angle is that divided by the number of edges. This means that a decagon has (10 – 2) * 180 = 1440 degrees and its interior angle is 1440 / 10 = 144. Since we start from straight pieces of wood, we can view the current state as two pieces aligned along the same line, or 180 degrees, which needs to bend to 144 degrees. This means that the angle we need to cut for each piece of the wall is 180 – 144 = 36 degrees, but we also want it to look good and have a little more structure when connected, so we would split this angle into a 18 degree cut on both ends of the wall.

We are not done yet, though, because we need to account for an entrance for the greenhouse, so we basically take out one of the ten pieces of the decagon and bring the ends straight out. For these corridor pieces, there is actually a 90 degree rotation from the orientation of the theoretical 10th piece, so we have to subtract 144 and 90 from 360 which gives us 126 degrees for the angle between pieces. The actual angle that needs to be cut is 180 – 126 = 54 degrees. Both the end and corridor pieces will have a 54 / 2 = 27 degree cut each to complete our inner wall..

Grow with the flow!

PS #7: Getting Back on Track

After last Build Day’s shenanigans with the dome being stolen, we quickly ordered a new one so we could get back to work as soon as possible. We rebuilt the dome today, quite a bit faster than the initial construction, a telltale sign of our improvement, if you ask me.

Now that we were back on track, we could start mounting the dome on the inner wall. It took a team effort of 6 of us to transport the dome onto the wall, as you can see below. When it comes to securing the dome, we chose to use metal hanger straps which allow us to conform to the odd shape of connecting a pipe and flat surface. While this happened, we had a separate team grinding out in dismantling the planter boxes so that we could have more wood for next Build Day.

Grow with the flow!

PS #6: Dome Disaster

Today’s Build Day ended up being quite short, much more than anyone would’ve thought. The early birds of our group congregated with “Good mornings” and “How have you beens” as we briefly went over the general plan for today.

Last week, we had wrapped up the inner walls of the greenhouse and, now, we were ready to secure the dome to it. We held Build Days quite early, so we had to open the garden up as the first people there. The few of us walked to the back and opened the gate, but then the chirping of the birds filled the sudden absence of our voices and footsteps as we all stopped to look ahead in confusion. Something was definitely off and what we all thought in our heads, but Aman actually exclaimed, “WHERE IS THE DOME?” It had mysteriously vanished. The walls that we just finished were thankfully still there, but it lacked the rest of the greenhouse’s structure. We split up to look all around the garden in the hopes that it was just moved by others, but our efforts were to no avail.

As the rest of our group arrived one by one, we entertained ourselves by capturing their reaction on camera. We were all stunned by this disappearance, but in our survey of the area, we noticed missing steel from the welder, so it was probably a junkie who lifted the dome. Likely a pair or even a trio, really. Since we could not continue work on the greenhouse without the dome, we let everyone go for the day, marking the shortest, yet maybe the most entertaining Build Day for a while. 

Grow with the flow!

PS #5: Upgrading the Inner Walls

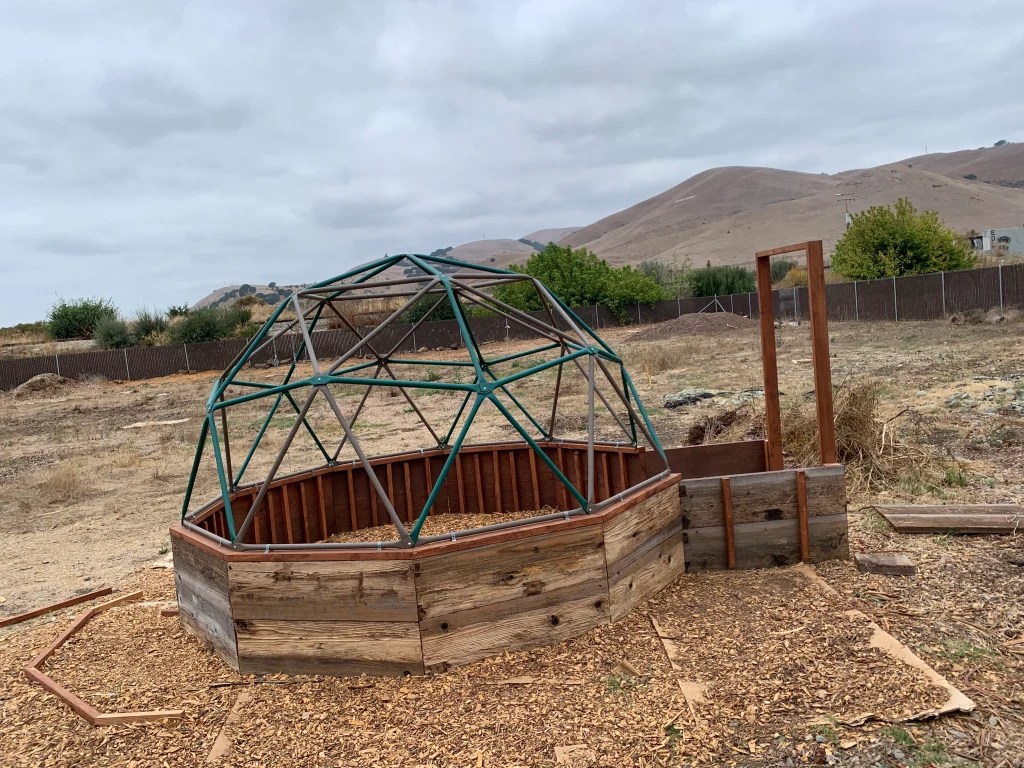
Last week we finished up the inner wall and the dome fits on it, but we do have to account for some error. We decided to create a sort of balcony outlining the wall for the dome to sit on more securely. We needed to salvage a bit more wood, but after that we got to working on cutting and painting the pieces. After we secured them together and screwed them to the tops of the inner walls. We tested the dome and it fit perfectly.

Next week we will join the walls and dome, so we can see a little what our final product will be like.

Grow with the flow!

PS #4: Building The Inner Wall

Today, we finished building the inner wall of the greenhouse. Constructing the wall wasn’t just about sticking pieces together; it was a meticulous process that required precise measuring and careful planning. To start, everyone had to disassemble the planter boxes, which involved two hours of back-breaking labor, crouching down and drilling out multiple screws from each corner of the box. Then, each piece had to be measured and cut according to the length of each side of the dome. However, since the wood from the planter boxes had been worn down, we had to do additional work on each piece for the inner wall. Each piece of wood had to be carefully sanded down and stained to make it waterproof. Finally, we drilled all the pieces together to complete the base. The process was challenging but ultimately rewarding, as it taught us the importance of math in construction.

Keep calm and keep growing!