How to Start a School Garden

A checklist for Bay Area teachers

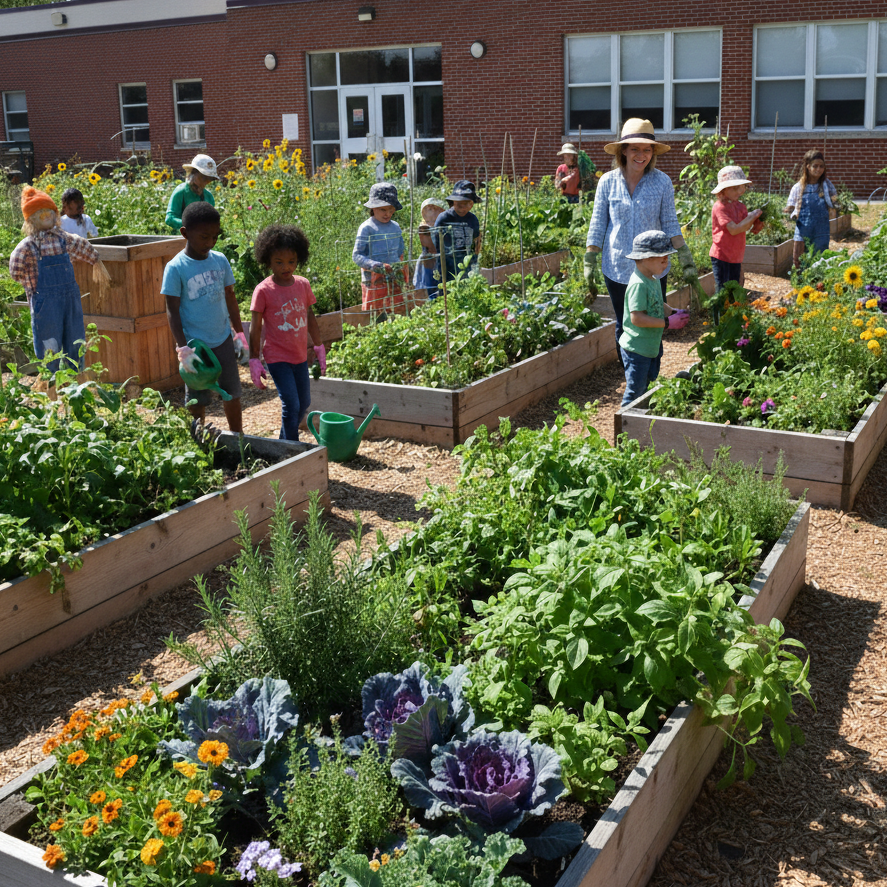
If you teach in the Bay Area, you have a head start most of the country doesn’t: you can grow food outdoors almost all year. Fall is the best time to begin. The rains do some of your watering, cool-season crops are forgiving, and you’ll harvest before spring testing season takes over the calendar.

Most school gardens don’t fail because of soil or pests. They fail because one teacher carries everything, then summer arrives and no one waters. This checklist is built to prevent that. It covers six phases, from getting a yes from your principal to serving your first harvest.

At Climate Roots, we’ve built three gardens and grown several culinary, medicinal, and ornamental plant varieties. Everything below comes from what worked, and what we’d do differently.

Phase 1: Build your team and get approval

A garden needs a core team of at least three adults before the first shovel goes in. One person is a project. Three people is a program.

  • Recruit your core team. Aim for two teachers plus one parent or community volunteer. Add a custodian or facilities lead early; they control water access, keys, and weekend security.
  • Recruit student leaders. Ask 4 to 6 students to own specific jobs: watering schedule, seed inventory, social media, harvest log. Ownership is what keeps a garden alive.
  • Write a one-page proposal. Cover the purpose, location, size, cost, who maintains it, and how it connects to what students are already learning.
  • Meet with your principal. Bring the proposal. Ask for three things: a site, a small budget line or permission to fundraise, and a named point of contact in the front office.
  • Loop in district facilities. Many Bay Area districts require facilities sign-off for anything built on campus, including raised beds and irrigation. Ask now; it can take weeks.
  • Check your district’s volunteer rules. Parents and outside mentors often need a volunteer application, TB clearance, or fingerprinting before working with students.

Phase 2: Choose and prepare the site

The right site gets 6 or more hours of direct sun, sits within reach of a hose bib, and is visible from classrooms. Visibility matters more than people expect: a garden students walk past every day gets cared for.

  • Map sun and shade. Check the spot at 9 a.m., noon, and 3 p.m. Watch for shadows from portables and buildings, which get longer in winter.
  • Confirm water access. Find the nearest spigot and confirm it’s on and unlocked. Carrying water across campus will end your garden by October.
  • Test the soil before growing in the ground. Bay Area campuses near older buildings or busy roads can have lead in the soil. Send a sample to a soil lab, or skip the question entirely by building raised beds with clean soil.
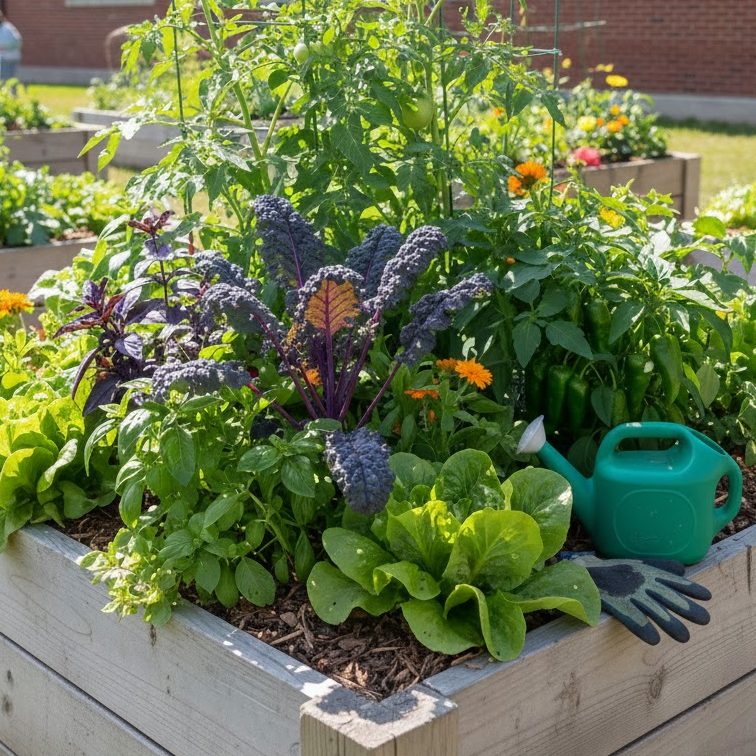
  • Default to raised beds. They drain well in our clay soils, keep little feet off the plants, and can be built at wheelchair height for accessibility.
  • Plan for security. A simple fence or gate deters weekend visitors and animals. Ask facilities what’s allowed.
  • Start small. Two or three 4 x 8 ft beds is plenty for year one. You can always expand; it’s much harder to shrink a garden that’s overwhelming your team.

Phase 3: Plan what to grow

Plant for the school calendar, not the garden catalog. The classic mistake is planting tomatoes in May that ripen in July, when no one is on campus to eat them. In the Bay Area, cool-season crops are your best friend: they grow from fall through spring, exactly when students are there.

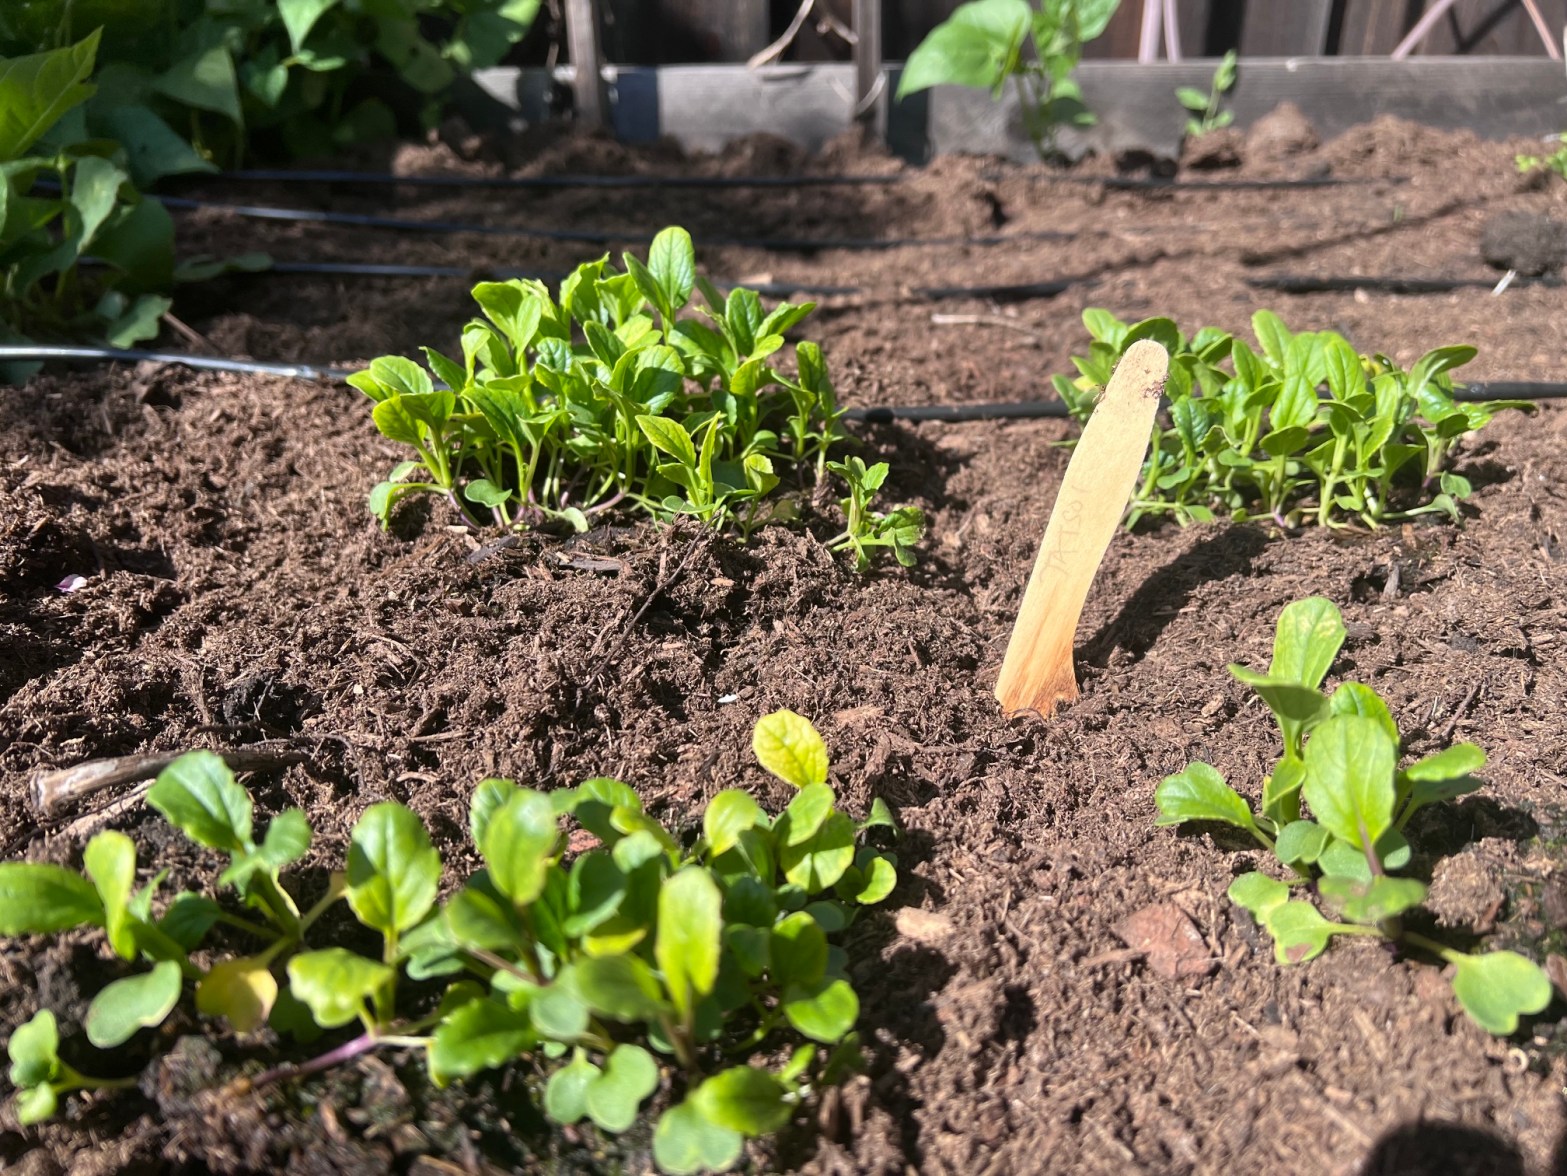
Between Sep – Nov, you can plant lettuce, radishes, kale, chard, peas, carrots, fava beans, and garlic.

  • Pick 5 to 8 crops for year one. Favor fast growers (radishes in about 4 weeks) so students see results early.
  • Grow at least one thing students already eat.
  • Use a local planting guide. Microclimates vary between San Francisco fog and San Jose heat. Our Fremont Planting Guide is a good starting point for the East Bay and South Bay.
  • Add native plants and flowers. Pollinator plants bring bees and butterflies, and give science classes something to observe year-round.

Phase 4: Fund it

A starter garden of two or three raised beds typically costs $500 to $1,500 (our estimate), and small grants can cover most of it. Stack two or three small grants rather than waiting on one large one.

  • Apply for grants closing this fall first. These two grants close in early October: WaterWise Garden Grant and CalCoastCU Cares Foundation Grant.
  • Ask your school nutrition director about the cafeteria fund. California guidance lets schools use cafeteria funds for garden supplies when the garden supports the school meal program (CDE).
  • Ask your PTA or PTO. A garden is an easy yes for parent groups: visible, hands-on, and photogenic.
  • Request in-kind donations. Local nurseries and hardware stores often donate soil, lumber, or seeds for school projects.
  • Take photos from day one. Nearly every grant asks for them, and so will your next funder.

Phase 5: Plant, water, and sustain through summer

Water is the single biggest reason school gardens die. Solve it with automation, then build a people plan for the weeks automation can’t cover.

  • Install drip irrigation on a timer. A basic drip kit and a battery timer on the hose bib keeps beds alive over weekends and breaks. Mulch the beds to cut water use further.
  • Turn watering into a tech project. Soil moisture sensors and a simple microcontroller let students track, graph, and eventually automate watering. This is where gardening meets coding, and it’s the kind of project our students built into the Climate Roots greenhouse.
  • Post a weekly job chart. Rotate classes or student teams through watering, weeding, and harvest checks.
  • Start a compost bin. Use fruit and vegetable scraps and garden trimmings only. Keep meat, dairy, and cafeteria waste out; USDA guidance warns animal products can introduce pathogens (USDA).
  • Make a summer plan by April. Choose one: recruit “garden families” to adopt a week each, partner with a summer program on campus, or put the beds to rest with a cover crop and thick mulch.
  • Set garden rules with students. Closed-toe shoes, tools pointed down, wash hands after, ask before you eat. Post them at the gate.

Phase 6: Harvest safely and connect it to learning

The USDA does not prohibit serving school garden produce in school meals, but your school nutrition director makes the call (USDA). Talk to them before your first harvest, not after.

  • Agree on harvest rules with food services. Clean, food-grade bins only; never trash bags or containers that held chemicals. Toss produce with bird droppings or animal bites.
  • Check with your county health department. Some local policies add requirements for classroom tastings or cafeteria use.
  • Use California’s food safety toolkit. CDFA’s Farm to School Food Safety Toolkit includes a section on school gardens.
  • Map the garden to standards. Plant life cycles, soil and water systems, and ecosystems (NGSS life and earth science), measurement and data (math), and nutrition (health).
  • Keep a harvest log. Students weigh and record every harvest. It’s real data for math class and powerful proof for your next grant.
  • Celebrate. A harvest tasting, a salad day, or a family garden night turns a class project into a school tradition.

Phase 6: Harvest safely and connect it to learning

The USDA does not prohibit serving school garden produce in school meals, but your school nutrition director makes the call (USDA). Talk to them before your first harvest, not after.

  • Agree on harvest rules with food services. Clean, food-grade bins only; never trash bags or containers that held chemicals. Toss produce with bird droppings or animal bites.
  • Check with your county health department. Some local policies add requirements for classroom tastings or cafeteria use.
  • Use California’s food safety toolkit. CDFA’s Farm to School Food Safety Toolkit includes a section on school gardens.
  • Map the garden to standards. Plant life cycles, soil and water systems, and ecosystems (NGSS life and earth science), measurement and data (math), and nutrition (health).
  • Keep a harvest log. Students weigh and record every harvest. It’s real data for math class and powerful proof for your next grant.
  • Celebrate. A harvest tasting, a salad day, or a family garden night turns a class project into a school tradition.

You don’t have to do this alone: start a Climate Roots School Chapter

Climate Roots School Chapters turn your garden into a student-led climate hub, backed by our curriculum, resources, and mentors. You bring the students and the site. We bring the playbook.

What chapters can build

  1. School gardens and hydroponic greenhouses
  2. Composting programs
  3. Student-led climate fairs
  4. AgTech workshops that combine growing food with sensors, automation, and coding

Who it’s for

Bay Area K to 12 teachers, administrators, and student leaders who want hands-on climate education on their campus. No gardening experience required.

How to start

Tell us about your school via the Contact Us form and we will be in touch with next steps.
Inside Tree Gleaning: How Backyard Fruit Reaches Families in Need

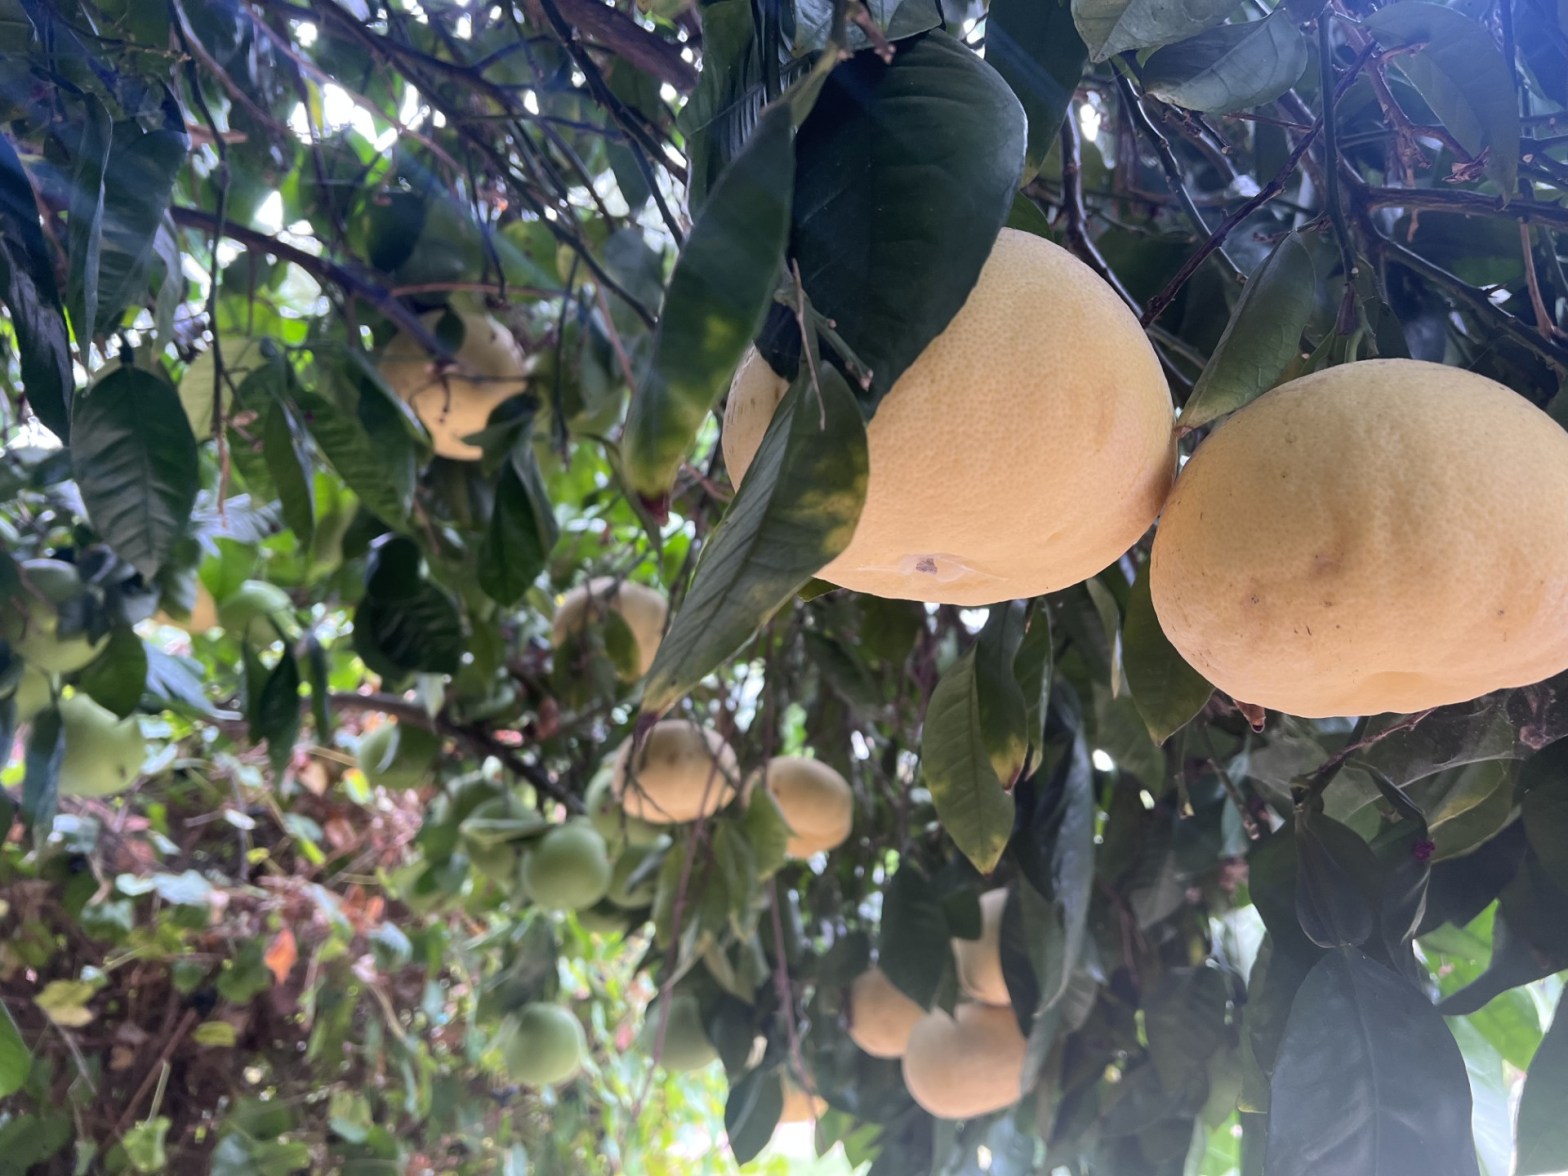
Every fall, Bay Area backyards fill up with more fruit than any one family can eat. Lemons pile up on patios. Persimmons split on the branch. Apples drop and rot in the grass. Meanwhile, families a few streets away are stretching grocery budgets and going without fresh produce.
Tree gleaning closes that gap. Here is how it works, who makes it happen, and what we have rescued so far this year.

This year, our Tree Gleaning Team has picked 812 pounds of fresh fruit that would otherwise have gone to waste and mobilized 11 volunteers from across the Bay Area.

To put 812 pounds in perspective: using Feeding America’s benchmark of about 1.2 pounds of food per meal, that is roughly 676 meals’ worth of fresh fruit delivered to local families. Every pound came from a tree that already existed. No new land, water or fertilizer required.

How It Works: From Branch to Food Bank
Gleaning is simple: we harvest surplus fruit from trees and donate it to food banks serving our community. Here is the path a single lemon takes.

  1. A homeowner reaches out. A neighbor with more fruit than they can use fills out our Tree Gleaning request form. The service is completely free.
  2. We schedule a pick. Our team follows up to learn what kind of tree it is, how much fruit is ready and when we can visit.
  3. Volunteers harvest. A small crew arrives with picking poles, ladders, gloves and bins. We pick only sound, ripe fruit and leave some behind for the homeowner if they want it.
  4. We sort and weigh. Bruised or damaged fruit goes to compost. Everything else is weighed so we can track exactly how much we rescue.
  5. We deliver. The same day, the fruit goes to the TCV food bank, where it reaches families within days.
  6. We log the impact and every pound is added to our running total.

The whole visit usually takes 1-3 hours. For the homeowner, the only job is saying yes.

Why This Matters
Food waste and food insecurity are two sides of the same problem. When fruit rots on the branch, the water, soil nutrients and sunlight that grew it are lost too. When it reaches a family, it becomes nutrition that food banks often struggle to stock: fresh, whole produce.

Gleaning also fits the bigger picture at Climate Roots. We believe health is downstream from nutrient-dense food, and that the best solutions work with the systems nature already built. A backyard tree is one of those systems. Gleaning just makes sure its harvest reaches the people who need it.

Get Involved
Fall is peak season, and there is more fruit out there than our team can pick. Here is how you can help:

  1. Have a fruit tree? Request a free glean and we will harvest your surplus for a local food bank.
  2. Want to pick? Sign up to volunteer. No experience needed, and hours count toward service requirements.
  3. Already volunteered? Submit your hours so we can keep our impact numbers accurate.
  4. Can’t pick? Donate to help cover ladders, poles, bins and gas for delivery runs.

Build a Raspberry Pi Soil Moisture Monitor

A Beginner Project for Teens

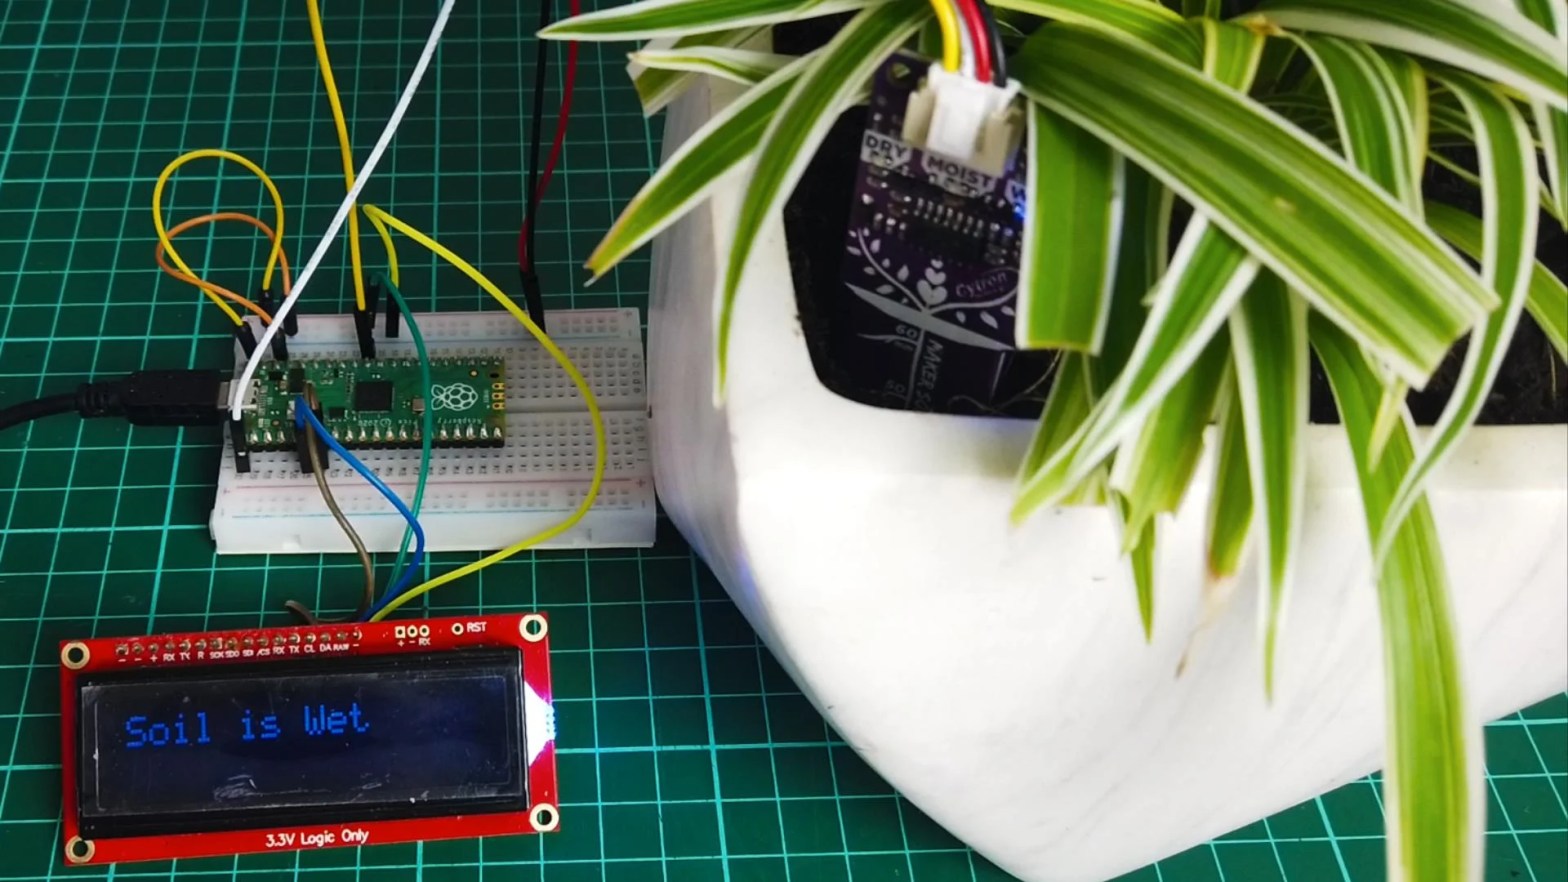
In one afternoon, you can build a sensor that tells you exactly when your plants need water, and prints it to your screen every few seconds.
At Climate Roots, we grow food in community gardens and a student-built greenhouse. One lesson keeps coming up: plants don’t die from lack of care, they die from guessing. Too much water drowns roots. Too little and your lettuce wilts before harvest. A soil moisture monitor replaces guessing with data.
This project is built for beginners. If you can plug in a USB cable and copy a line of code, you can do this. By the end, you will have:

  1. A working soil moisture sensor wired to a Raspberry Pi
  2. A Python program that reads moisture as a percentage (0% dry, 100% wet)
  3. An alert that tells you when it’s time to water
  4. A log file you can graph to see how your soil dries out over time

Time: 1 to 2 hours.
Cost: about $15 in parts if you already have a Pi.
Skill level: beginner.

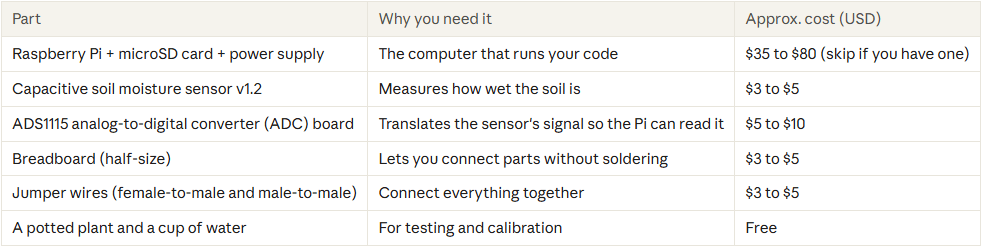
What you’ll need
Any Raspberry Pi with the 40-pin header works (Pi 3, 4, 5, or Zero 2 W). Prices are typical US retail and will vary.

Tip: Buy a capacitive sensor, not the cheap two-prong resistive kind. Resistive probes pass current through the soil and corrode within weeks. Capacitive sensors are sealed and last much longer.

Some ADS1115 boards arrive with loose header pins. If yours does, ask a mentor or teacher to help you solder them on. It’s a great first soldering job.

How it works
The sensor sends out a voltage that drops as the soil gets wetter. Water changes how electricity behaves around the sensor’s sealed probe (its capacitance), and the sensor turns that into a voltage between roughly 1 and 3 volts.
Here’s the catch: the Raspberry Pi can only read digital signals, meaning on or off. It has no built-in way to read a voltage in between. That’s why we add the ADS1115. It measures the voltage and sends the Pi a number over a two-wire connection called I2C.

So the data flows like this:

Soil--> Sensor(voltage)--> ADS115(number)--> RPi(Python)--> Your screen

One important detail: this sensor reads higher when dry and lower when wet. It feels backwards at first. Our code flips it so 100% means soaked.

Step-by-step build

Step 1: Set up your Pi and turn on I2C

Start with Raspberry Pi OS installed and your Pi connected to a screen or reachable over SSH. Open a terminal and run:

sudo apt update
sudo apt install -y i2c-tools python3-venv
sudo raspi-config nonint do_i2c 0
sudo reboot

Step 2: Wire it up

Unplug the Pi’s power before wiring. Connecting wires to a powered board is the fastest way to fry something.

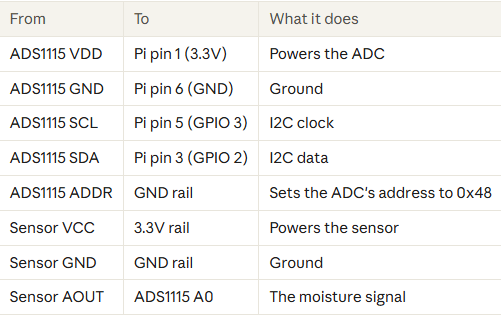
Place the ADS1115 on the breadboard, then make these connections. Pin numbers are the physical pin numbers on the Pi’s 40-pin header (pin 1 sits on a square solder pad; type pinout in the terminal to see a map of your board)

Use the breadboard’s power rails to share 3.3V and GND between the ADC and the sensor. We power everything from 3.3V (not 5V) so the signal stays in a safe range for the Pi.

Step 3: Check that the Pi can see the ADC

Power the Pi back on and run:

i2cdetect -y 1

You should see 48 in the grid. That’s your ADS1115 saying hello.

Step 4: Install the Python library

We’ll keep the project in its own folder with its own virtual environment, a private box for this project’s Python packages:

mkdir ~/soil-monitor
cd ~/soil-monitor
python3 -m venv .venv
source .venv/bin/activate
pip install adafruit-blinka adafruit-circuitpython-ads1x15

You’ll see (.venv) at the start of your terminal line. That means the environment is active. Run source .venv/bin/activate again any time you open a new terminal.

Step 5: Take your first reading

Create a file called test.py and paste this in:

import time
import board
from adafruit_ads1x15 import ADS1115, AnalogIn, ads1x15
i2c = board.I2C()
ads = ADS1115(i2c)
sensor = AnalogIn(ads, ads1x15.Pin.A0)
while True:
print(f"raw: {sensor.value:6d} voltage: {sensor.voltage:.3f} V")
time.sleep(1)

Run it with python test.py. Numbers should scroll by once per second. Press Ctrl+C to stop.

Step 6: Calibrate your sensor

Every sensor is slightly different, so you need to teach your code what “dry” and “wet” look like for yours. Run test.py again and record two voltages:

  1. Dry: hold the sensor in the air (or push it into bone-dry soil). Write down the voltage.
  2. Wet: dip the sensor into a cup of water. Write down the voltage.

Only dip the probe up to the white line printed on it. The electronics at the top must stay dry.

Your numbers might look something like 2.50 V dry and 1.20 V wet. Yours will differ, and that’s fine. That’s the whole point of calibrating.

Step 7: Write the monitor program

Create soil_monitor.py and paste in the code below. Change DRY_VOLTAGE and WET_VOLTAGE to your numbers from Step 6.

"""Soil moisture monitor.
Reads a capacitive soil sensor through an ADS1115 ADC,
prints moisture as a percentage, and logs every reading to a CSV file.
"""
import csv
import time
from datetime import datetime
from pathlib import Path
import board
from adafruit_ads1x15 import ADS1115, AnalogIn, ads1x15
# ---- Settings: put YOUR calibration numbers here ----
DRY_VOLTAGE = 2.50 # sensor in dry air or bone-dry soil
WET_VOLTAGE = 1.20 # sensor in water (up to the line) or soaked soil
WATER_BELOW = 35 # show an alert when moisture drops below this %
READ_EVERY = 10 # seconds between readings
LOG_FILE = Path("moisture_log.csv")
# -----------------------------------------------------
i2c = board.I2C()
ads = ADS1115(i2c)
sensor = AnalogIn(ads, ads1x15.Pin.A0)
def read_voltage(samples=10):
"""Average several quick readings to smooth out noise."""
total = 0.0
for _ in range(samples):
total += sensor.voltage
time.sleep(0.05)
return total / samples
def to_percent(voltage):
"""Turn a voltage into 0-100% moisture (dry = 0, wet = 100)."""
percent = (DRY_VOLTAGE - voltage) / (DRY_VOLTAGE - WET_VOLTAGE) * 100
return max(0, min(100, round(percent)))
def log_reading(timestamp, voltage, percent):
"""Add one row to the CSV log, writing a header the first time."""
new_file = not LOG_FILE.exists()
with LOG_FILE.open("a", newline="") as f:
writer = csv.writer(f)
if new_file:
writer.writerow(["timestamp", "voltage", "moisture_percent"])
writer.writerow([timestamp, f"{voltage:.3f}", percent])
def main():
print("Soil monitor running. Press Ctrl+C to stop.")
while True:
voltage = read_voltage()
percent = to_percent(voltage)
now = datetime.now().strftime("%Y-%m-%d %H:%M:%S")
status = "Time to water!" if percent < WATER_BELOW else "Soil looks good."
bar = "#" * (percent // 5)
print(f"{now} {percent:3d}% [{bar:<20}] {status}")
log_reading(now, voltage, percent)
time.sleep(READ_EVERY)
if __name__ == "__main__":
try:
main()
except KeyboardInterrupt:
print("\nStopped. Your data is saved in", LOG_FILE)

What each part does:

  1. Settings hold your calibration numbers and alert level, all in one place so they’re easy to change.
  2. read_voltage() takes 10 quick readings and averages them. Single readings jump around a little; averaging smooths that out.
  3. to_percent() flips and scales the voltage so dry is 0% and wet is 100%. The max/min keeps the result between 0 and 100 even if a reading goes past your calibration points.
  4. log_reading() saves every reading to moisture_log.csv, which opens in Google Sheets or Excel.
  5. main() loops forever: read, convert, print a little bar graph, save, wait.

Step 8: Plant it and run it

Push the sensor into your plant’s soil, up to the white line, a few centimeters from the stem. Then run:

python soil_monitor.py

You’ll see output like this:

2026-04-25 14:02:10 62% [############ ] Soil looks good.
2026-04-25 14:02:20 61% [############ ] Soil looks good.

Test it: water the plant and watch the number climb.

Want it to start automatically when the Pi turns on? Run crontab -e and add this line at the bottom:

@reboot sleep 30 && cd ~/soil-monitor && .venv/bin/python soil_monitor.py >> monitor.out 2>&1

Now the Pi logs moisture day and night, even without a screen attached.

Level up

Once your monitor works, here’s where to take it next. Each idea builds on the code you already wrote.

  1. Graph your data. Open moisture_log.csv in Google Sheets and make a line chart. You’ll see how fast your soil dries on hot days versus cool ones.
  2. Add more plants. The ADS1115 has four inputs (A0 to A3). Wire three more sensors and track a whole garden bed.
  3. Add a light. Connect an LED to a GPIO pin and turn it on when it’s time to water.
  4. Automate watering. Add a relay and a small pump so the Pi waters the plant itself. This is exactly the kind of system our greenhouse team builds.
  5. Enter a competition. Turn your monitor into a project for a Climate Roots youth competition. Judges love real data from real gardens.

Grow with us

This project is a small version of what Climate Roots students do every week: combining sustainable food gardening with robotics, automation and data. Want to build bigger things with a team? Get involved or check out our programs.

As always, keep calm and keep growing!

Announcing the Seeds of Health Idea Challenge

Have an idea that uses food, gardens, or green spaces to help people live healthier lives? Climate Roots wants to fund it.

Today we are launching the Seeds of Health Idea Challenge, a community competition for ideas that connect growing food with human health. The winning idea receives $1,000 in seed funding plus mentorship from the Climate Roots team to turn it into a real project in our community.

You do not need to be a scientist, a gardener, or an entrepreneur. Some of the best ideas come from people who see a need up close: a student who volunteers at a senior center, a parent who notices kids don’t play outside, a neighbor with a fruit tree and nowhere to send the extra lemons.

Why we’re doing this

What we grow and how we live are deeply connected. Gardens get people moving, put fresh food on the table, bring neighbors together, and help communities adapt to a warming climate.

So far, Climate Roots has established 3 community gardens, taught hundreds of students, and donated thousands of pounds of produce. This challenge is how we find the next generation of projects, and the people who will lead them. Our mission has always been to support both human and planetary health. Now we want your ideas for doing that.

Competition categories

Every idea must connect food, gardens, or green space to human health. Choose the one category that fits your idea best.

  1. Healthy Aging and Intergenerational Connection. Ideas that help older adults stay active, connected, and well nourished. Example: a garden where teens and seniors grow food together.
  2. Food Access and Nutrition. Ideas that get fresh, healthy food to people who need it most. Example: routing gleaned fruit to families facing food insecurity, paired with simple recipes.
  3. Active Living and Wellbeing. Ideas that use gardening and outdoor spaces to support physical fitness, mental health, or recovery. Example: a garden fitness program or a quiet healing garden at a school.
  4. Climate and Health Resilience. Ideas that protect people from climate impacts like extreme heat, poor air quality, or drought. Example: shade and cooling plantings at a bus stop or playground.
  5. Garden Tech for Health. Ideas that use sensors, apps, automation, or data to make gardens more productive, accessible, or health-promoting. Example: a moisture sensor system that lets people with limited mobility maintain a garden.

Who can enter

The challenge is open to anyone who lives, works, or goes to school in the San Francisco Bay Area, in two divisions:

  1. Youth Division: ages 13 to 18. Entrants under 18 need a parent or guardian to sign the consent section of the entry form.
  2. Community Division: ages 18 and up, including college students, educators, health professionals, and community groups.

You can enter as an individual or as a team of up to 4 people. Teams may mix ages; a team enters the Community Division if any member is 18 or older.

Climate Roots volunteers and program participants are welcome and encouraged to enter.

Prizes and seed funding

AwardSeed fundingAlso includes
Grand Prize (1 winner, either division)$1,0006 months of mentorship, a garden plot or partner site introduction, feature on the Climate Roots blog
Youth Division Runner-Up$250Mentorship check-ins and blog feature
Community Division Runner-Up$250Mentorship check-ins and blog feature
Community ChoiceCertificate and recognitionChosen by public vote on Pitch Day

Seed funding is for launching the project, not a cash prize. Funds are released in two installments: half at kickoff and half after a progress check-in at the midpoint. For youth winners, funds are managed with a parent, guardian, or Climate Roots mentor. Winners share a short progress update at 3 months and a final report at 6 months.

Key dates

MilestoneDate
Submissions openMay 15, 2026
Submission deadlineJuly 15, 2026, 11:59 p.m. PT
Finalists notifiedAugust 01, 2026
Projects launchAugust 2026
Final project reports dueDecember 2026

How to submit

Submit your idea through this entry form link. Choose one format:

  1. Written proposal: up to 750 words, or
  2. Video pitch: up to 3 minutes, uploaded as an unlisted YouTube or Google Drive link, plus a one-paragraph written summary.

Either format must answer these seven questions:

  1. The problem: What health or community need are you addressing, and who experiences it?
  2. Your idea: What will you do, and how does it use food, gardens, or green space?
  3. Who benefits: Who will take part or be helped, and roughly how many people?
  4. Your plan: What are the main steps to launch within 6 months? Name any partner (school, senior center, clinic, faith group) you plan to work with.
  5. Budget: How would you spend the seed funding? A simple list of items and costs is enough.
  6. Measuring success: How will you know it worked? Name 1 to 3 things you will count or measure.
  7. Your team: Who is involved, and why are you the right people to do this?

You may submit one idea per person or team. Questions? Contact us via this form.

How ideas are judged

A panel of Climate Roots mentors, community health professionals, and youth leaders scores every entry. Youth entries are judged against other youth entries.

CriterionWeightWhat judges look for
Community impact30%Addresses a real, specific need and helps people in a meaningful way
Mission fit20%Clearly connects food, gardens, or green space with human health
Feasibility20%Realistic plan, budget, and partners to launch within 6 months
Measurable results15%Clear, simple ways to show the project worked
Creativity15%A fresh approach, or a proven idea applied in a new setting

The top [6] entries become finalists and present a 5-minute pitch on Pitch Day. Judges select the winners; attendees vote for Community Choice.

Official rules

  1. Original work. Ideas must be your own or your team’s. You may build on existing programs, but say so and explain what is new.
  2. One entry per person or team. A person may appear on only one team.
  3. You keep your idea. You own your idea. By entering, you allow Climate Roots to share your project name, summary, and team names (with consent for minors) to promote the challenge.
  4. Launch in the community. Winning projects must launch in the Bay Area within 6 months of the award.
  5. Use funds for the project. Seed funding may be spent only on project costs described in your budget, such as supplies, plants, tools, printing, or partner fees. It may not be used for salaries or personal expenses. Keep receipts. Unused funds are returned to Climate Roots.
  6. Report progress. Winners submit a short update at 3 months and a final report at 6 months. The second installment of funding depends on the midpoint check-in.
  7. Safety and consent. Projects that work with minors, older adults, patients, or other vulnerable groups must have approval from the partner site and written consent from participants. Projects may not provide medical treatment or make health claims.
  8. Judges’ decisions are final. Climate Roots may decline to award a prize if no entry meets the criteria, and may adjust these rules if needed, with notice posted on this page.
  9. AI tools are allowed for research and editing, but the idea and plan must be yours.

Ready to plant your idea?

  1. Submit your idea by July 15, 2026 at entry form link.
  2. Spread the word. Share this post with a student, teacher, neighbor, or health worker who has an idea worth growing.

We can’t wait to see what you plant.

Composting 101 for Families

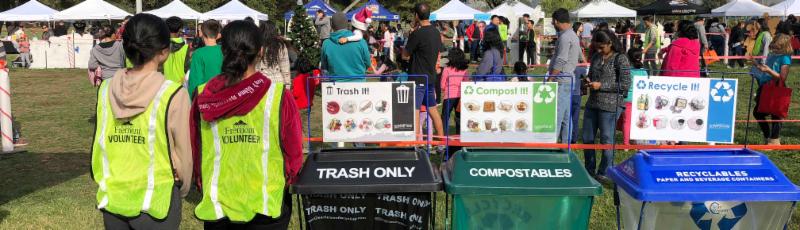
Worm bin or backyard pile? A simple guide to picking the right compost setup for your family, inspired by what we learned at Fremont Earth Day.

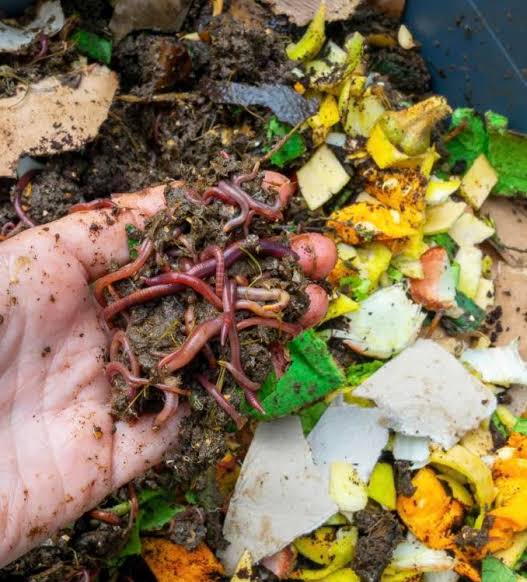
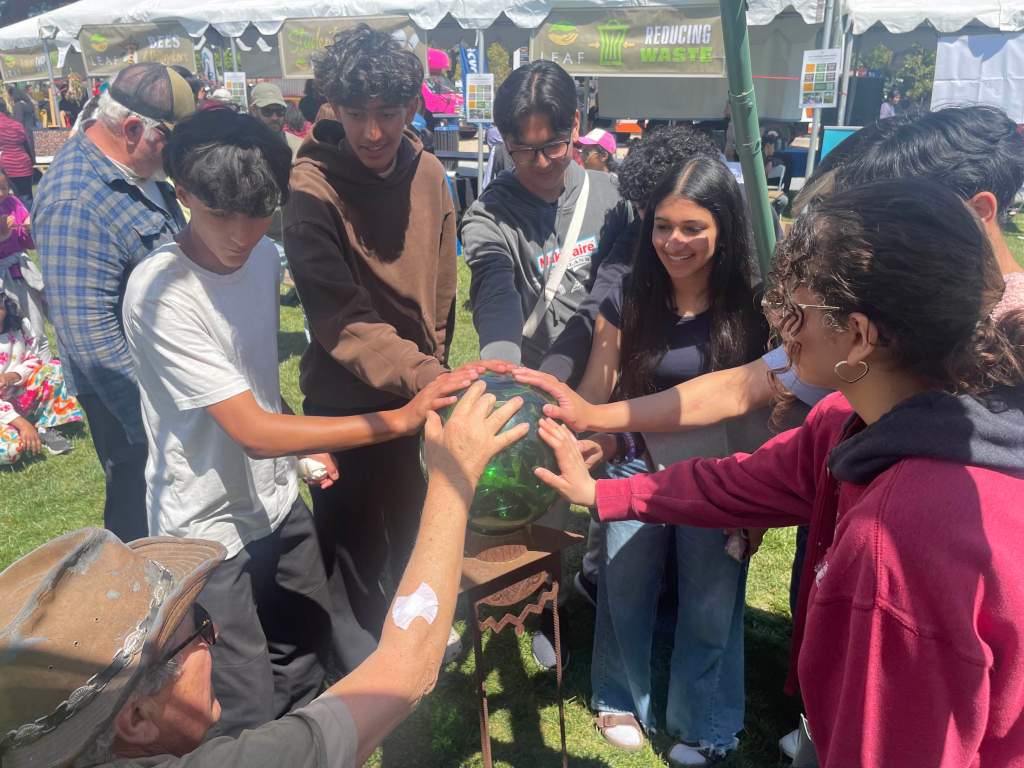
At the City of Fremont’s Earth Day, our team stopped by a booth that had kids and parents leaning in close: a bin full of worms turning kitchen scraps into rich, dark soil. It was one of those small moments that shows how a simple habit can make a big difference.
Composting is the easiest way for a family to start building soil instead of filling landfills. The good news: you don’t need a farm, or even a yard. You just need to pick the setup that fits your home. Here’s how to choose between the two most popular options, worm bins and backyard piles.

Why compost at all?

Healthy food starts with healthy soil. As we wrote in Designing With Nature, Not Against It, nutrient-dense food depends on living soil, and living soil depends on practices like composting.

When food scraps go to a landfill, they break down without oxygen and release methane, a powerful greenhouse gas. When they go into a compost bin, they become food for the soil microbes that feed your plants. Same banana peel, very different outcome.

For kids, composting is also a living science lab. They get to watch decomposition, nutrient cycles, and whole ecosystems at work, right outside the back door.

Option 1: The worm bin (vermicomposting)

A worm bin is a covered container where red wiggler worms eat your food scraps and turn them into castings, one of the richest soil amendments you can give a garden. This is the setup we saw in action at Earth Day, and it’s the one kids usually fall in love with.

How it works:

  1. Start with a plastic or wooden bin with air holes and a lid. A two-tray stacking bin makes harvesting easier.
  2. Add moist bedding: shredded newspaper, cardboard, or coconut coir, damp like a wrung-out sponge.
  3. Add red wigglers (not garden earthworms). About 1 pound of worms is a good start for a family of four.
  4. Bury small amounts of chopped scraps under the bedding a few times a week.
  5. Harvest the dark, crumbly castings every 3 to 4 months.

Best for: apartments, townhomes, small patios, classrooms, and families who want a hands-on project for kids.
Watch out for: overfeeding (the number one cause of smells and fruit flies), and extreme heat. Keep the bin in the shade or indoors during hot spells.

Option 2: The backyard pile

A backyard pile (or enclosed bin) relies on bacteria and fungi instead of worms. It handles far more volume, including yard waste, and needs little daily attention.

How it works:

  1. Pick a level, partly shaded spot on bare soil. A pile about 3 feet wide, deep, and tall holds heat well.
  2. Layer “browns” (dry leaves, straw, cardboard) and “greens” (food scraps, grass clippings). Aim for roughly 2 to 3 parts browns to 1 part greens.
  3. Keep it as moist as a wrung-out sponge.
  4. Turn it with a pitchfork every week or two to add oxygen and speed things up.
  5. Finished compost is ready in about 2 to 6 months if you turn it often, or 6 to 12 months if you mostly let it sit.

Best for: families with a yard, lots of leaves and garden trimmings, or a vegetable garden that needs a steady supply of compost.
Watch out for: a pile that’s too wet (slimy and smelly, add browns) or too dry (nothing happens, add water and greens). Use a closed bin if rodents are a concern.

What goes in, what stays out

Yes, for both: fruit and veggie scraps, coffee grounds and paper filters, tea leaves, crushed eggshells, plain paper and cardboard.
Yes, for piles only: leaves, grass clippings, small twigs, and plant trimmings.
Go easy in worm bins: citrus, onions, garlic, and spicy foods. Worms don’t like them.
Keep out of both: meat, fish, dairy, oils and greasy food, pet waste, and diseased plants. These attract pests and cause odors.

Make it a family project

Composting sticks when everyone has a job.

  • Ages 4 to 7: carry the kitchen scrap pail, tear newspaper for bedding, and say hi to the worms.
  • Ages 8 to 12: chop scraps, check moisture, and keep a simple log of what goes in each week.
  • Teens: manage the pile temperature with a compost thermometer, troubleshoot smells, or build a sensor setup to track temperature and moisture. Our students have done just that with Raspberry Pi in our mushroom farming class.

Start this weekend

You don’t have to wait for next Earth Day. Pick one setup, gather a bin and some cardboard, and start saving scraps this week. In a few months, you’ll have homemade compost ready for your garden. Check our Fremont Planting Guide for what to grow in it.
Want to dig deeper? Our new Climate Roots School Chapters will bring community composting and garden projects into Bay Area schools. Get involved or volunteer with us.

Keep calm and keep composting!

Designing With Nature—Not Against It

We’ve been told for decades that progress means mastering nature, outsmarting it, and building systems that override the natural world. But what if the real breakthrough isn’t in controlling nature—but in aligning with it?

This isn’t just a philosophical shift. It’s a practical one. And it’s reshaping how we think about food, health, resilience, and even the future of investment.

Let’s start with the chain of causality:

✅ Health is downstream from nutrient-dense food.
We can’t be truly healthy if what we eat lacks essential nutrients. Chronic disease, fatigue, and low immunity often trace back to nutritional gaps—not just in our diets, but in the soil where our food grows.

✅ Nutrient density is downstream from soil health.
Rich, living soil doesn’t just grow crops—it feeds them with a full spectrum of micronutrients. When soil is depleted—eroded, chemically treated, or lifeless—so are the plants, and so are we.

✅ Soil health is downstream from regenerative practices.
Cover cropping, composting, no-till farming, biodiversity—these aren’t just “eco-friendly” add-ons. They’re the foundation of a living system that heals itself, captures carbon, and builds resilience.

✅ Regenerative systems create resilient assets.
And here’s the shift: we’re not just growing food. We’re building systems—ones that are self-sustaining, climate-resilient, and scalable. These aren’t just farms. They’re living infrastructure.

The people coming to us aren’t just backyard gardeners or small-scale farmers. They’re from Silicon Valley and they’re asking the question:

How do we build food gardens that don’t create the problems we’re trying to solve?

They’re tired of solutions that create new dependencies, new risks, or new layers of complexity. They want systems that work—not just function.

So, what’s the answer?

Stop competing with systems optimized over 4 billion years. Design with them instead.

We’re not trying to invent a new way to grow food. We’re trying to reconnect with the way life already works—through photosynthesis, nutrient cycling, microbial networks, and natural resilience.

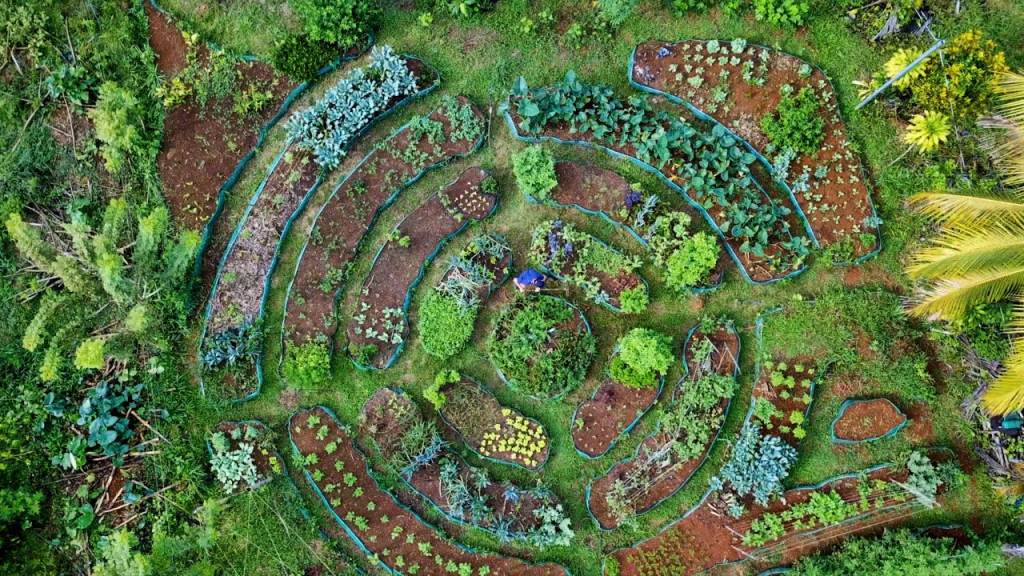
At Climate Roots, we’re building the proof of concept with a new regenerative garden set to launch in 2026.

This isn’t just about growing food. It’s about creating a model—one that’s scalable, replicable, and deeply aligned with the rhythms of life.

It’s a system that doesn’t just reduce harm. It rebuilds.

It’s a system where health flows naturally from the soil, where resilience grows from biodiversity, and where every investment supports a living, regenerating planet.

We’re not just building a garden.
We’re building a blueprint.

And we’d love you to be part of it.

Stay tuned. The next chapter is being written—by the land, with us, and for the future.

A new chapter

We’re writing with both heartfelt appreciation and thrilling anticipation as we share an important update: The Youth Leadership Council (YLC) of Climate Roots has officially dissolved. This isn’t an ending — it’s a transition — to Climate Roots School Chapters!

Over the past few years, the YLC has been a vibrant engine of youth-driven climate action. Led by passionate young changemakers, the Council played an instrumental role in shaping our organization’s youth programs and amplifying student voices across our initiatives. We’re deeply grateful for their dedication, creativity, and tireless energy.

🌟 What the YLC Achieved:

  • Youth Competitions: Under the leadership of Avni Goyal, Zyanya Ortiz and Roland Lee, the YLC helped design, promote, and hosted our Competition for Planet Earth series — empowering young people to present bold solutions to local environmental issues.
  • Greenhouse Building: With guidance from Jerry Kuhlman, Arjun Thakur and Pradyun Sethupathi transformed our flagship hydroponic greenhouse — from conceptualizing the hydroponic layout to building a solar powered setup to mentoring student builders and planting the first seedlings.
  • AgTech Class: Mushroom Growing at Home: Annika Jain and Aditya Narula co-created and led our wildly popular AgTech workshop, teaching students how to cultivate mushrooms indoors — blending science, sustainability, and fun in one deliciously educational experience.

These programs didn’t just happen — they were born from the vision, sweat, and laughter of YLC members. We thank each one of you for your leadership, collaboration, and unwavering belief in the power of youth to drive climate solutions.

🌱 What’s Next? The Launch of Climate Roots School Chapters!

While the Youth Leadership Council is stepping into a new chapter — perhaps as mentors, volunteers, or future leaders in other roles — we’re excited to announce the launch of our brand-new initiative: Climate Roots School Chapters.

Starting in early 2026, this program will empower schools across the Bay Area to become Climate Roots hubs — places where students can join hands, learn climate science through hands-on projects, and lead local sustainability efforts. Think: school-based greenhouses, community composting programs, student-led climate fairs, and AgTech workshops — all supported by Climate Roots resources, curriculum, and mentorship.

The School Chapters program is designed to scale our impact — bringing climate education directly into classrooms and communities, while giving every student a chance to lead.

We’re already in talks with pilot schools, developing curriculum modules, and building partnerships. And we can’t wait to share the first official launch date — stay tuned!

💌 A Final Thank You

To every member of the Youth Leadership Council: you’ve left an indelible mark on Climate Roots. Your passion, your projects, and your belief in the next generation have helped us grow into a stronger, more inclusive organization. We’re proud to have walked alongside you — and we can’t wait to see what you’ll do next.

Thank you for building greenhouses, growing mushrooms, and growing hope — one student at a time.

PS #26.5: Continuing The Greenhouse

It was a big jump from PS #26 to PS #27, and we, Kenric and Arin, want to catch you all up onto the work that has been done on the greenhouse.

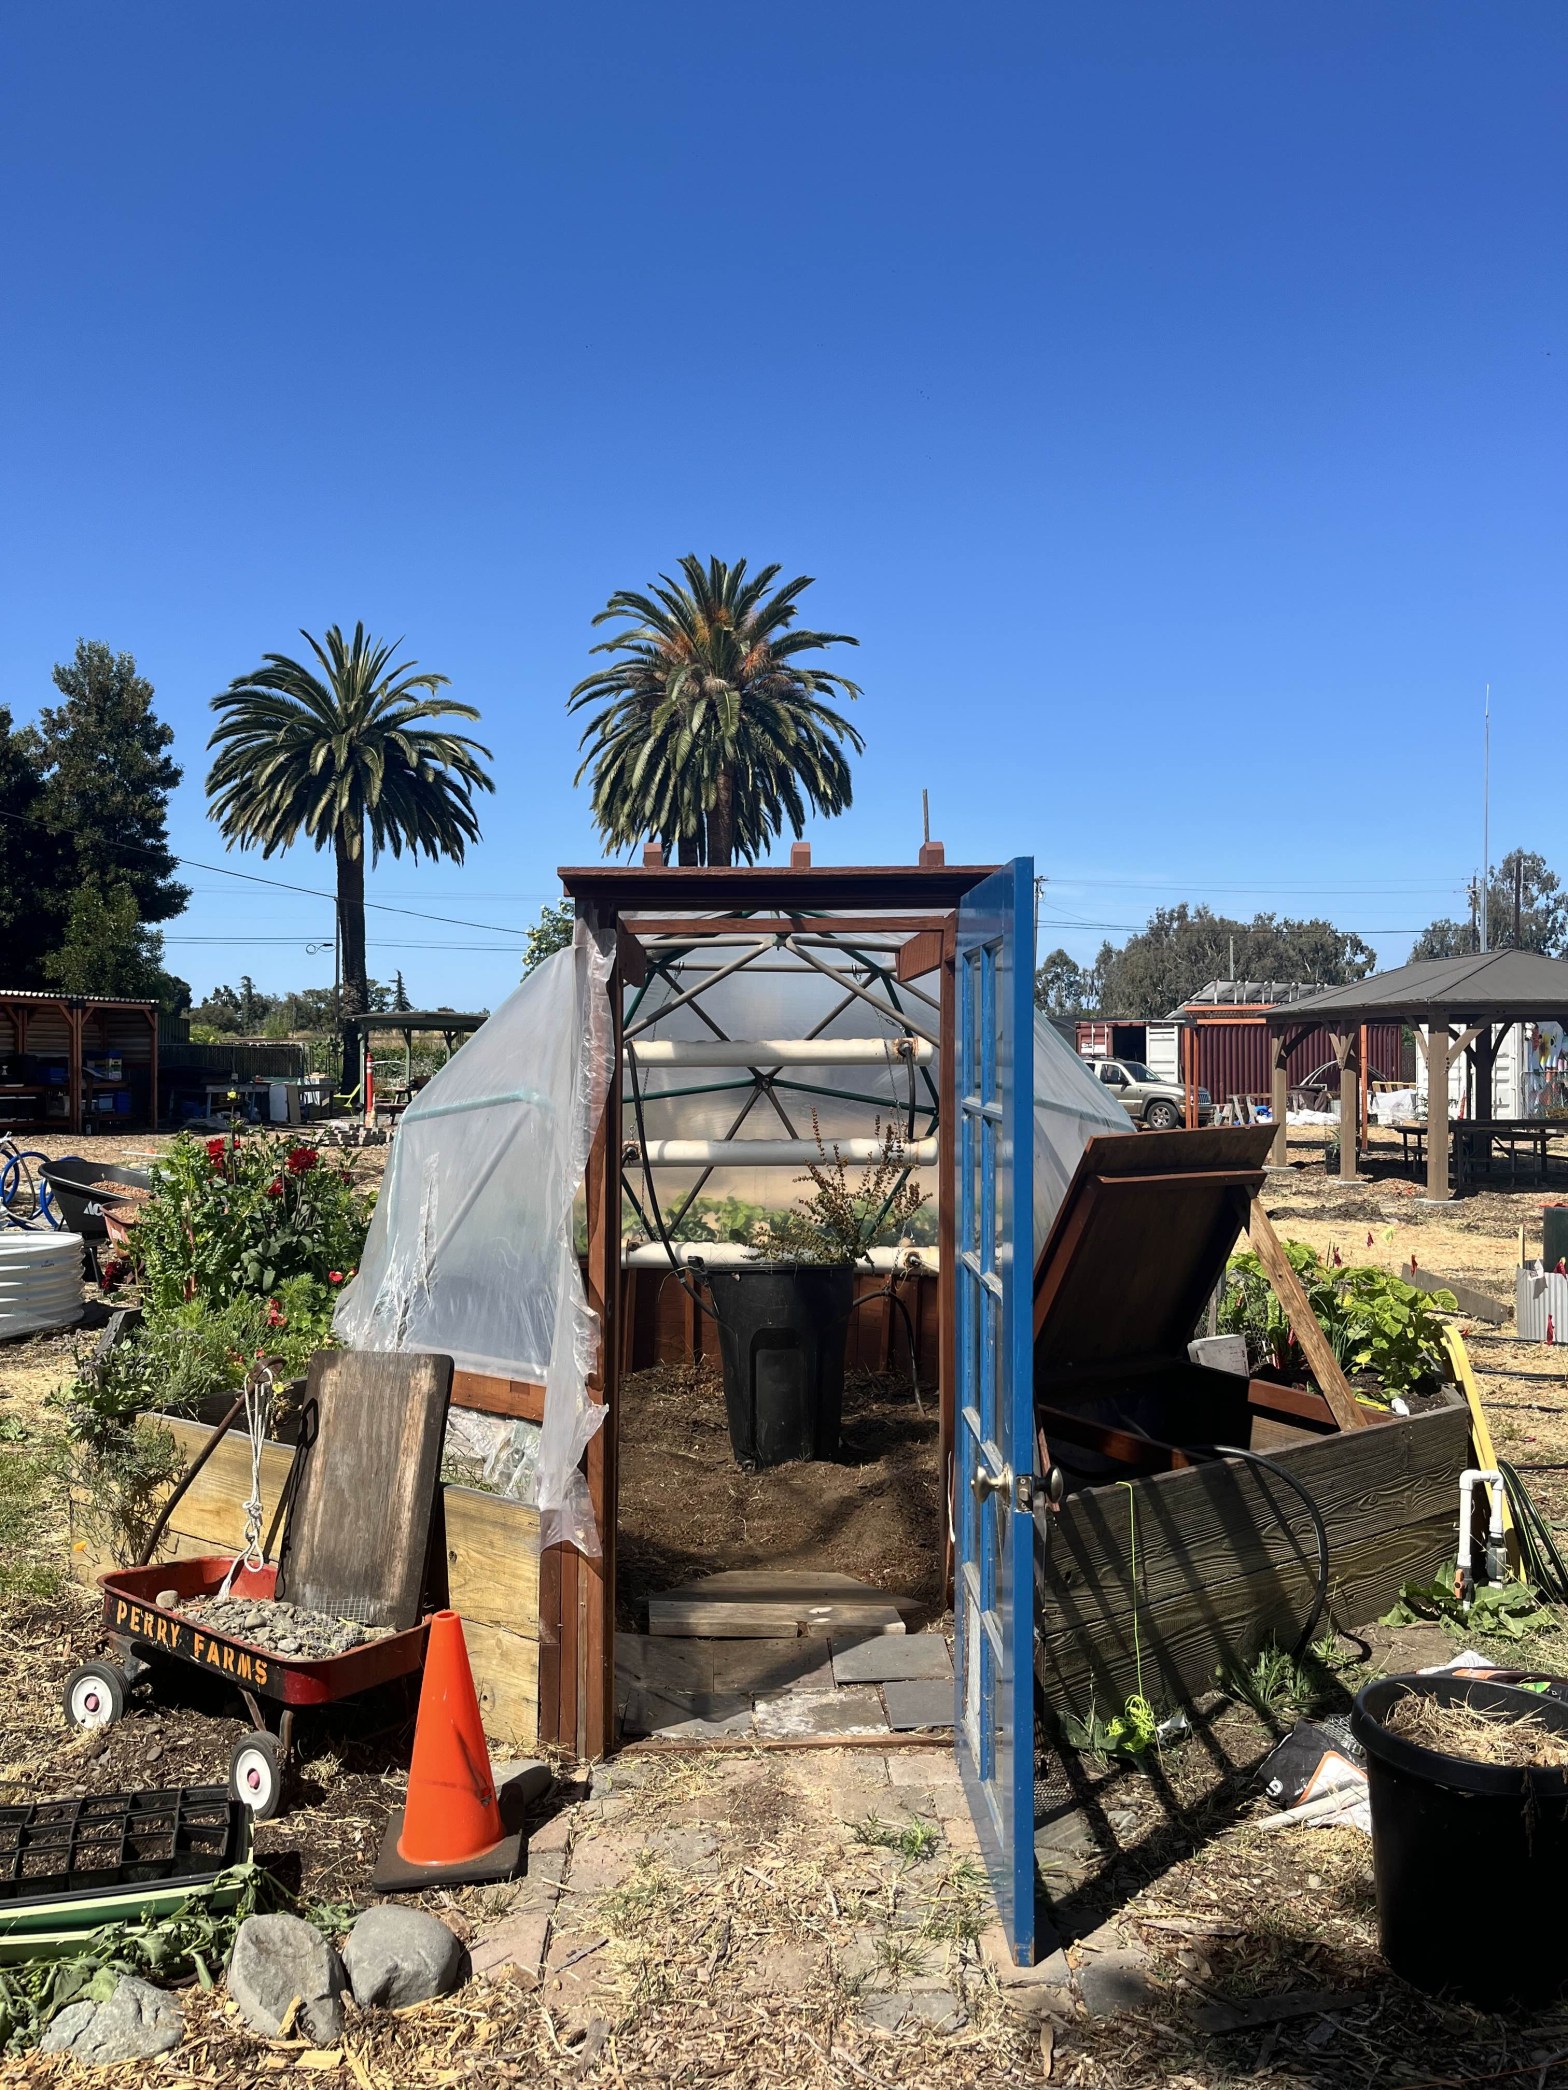
Starting from the first addition, a computer fan. Since the summer weather makes the greenhouse really hot for the plants, and even more uncomfortable to work inside of it, we decided to install a solar powered fan to cool it down. Unfortunately, we underestimated the size and power of the fan, leading the greenhouse to still get really hot in the summer.

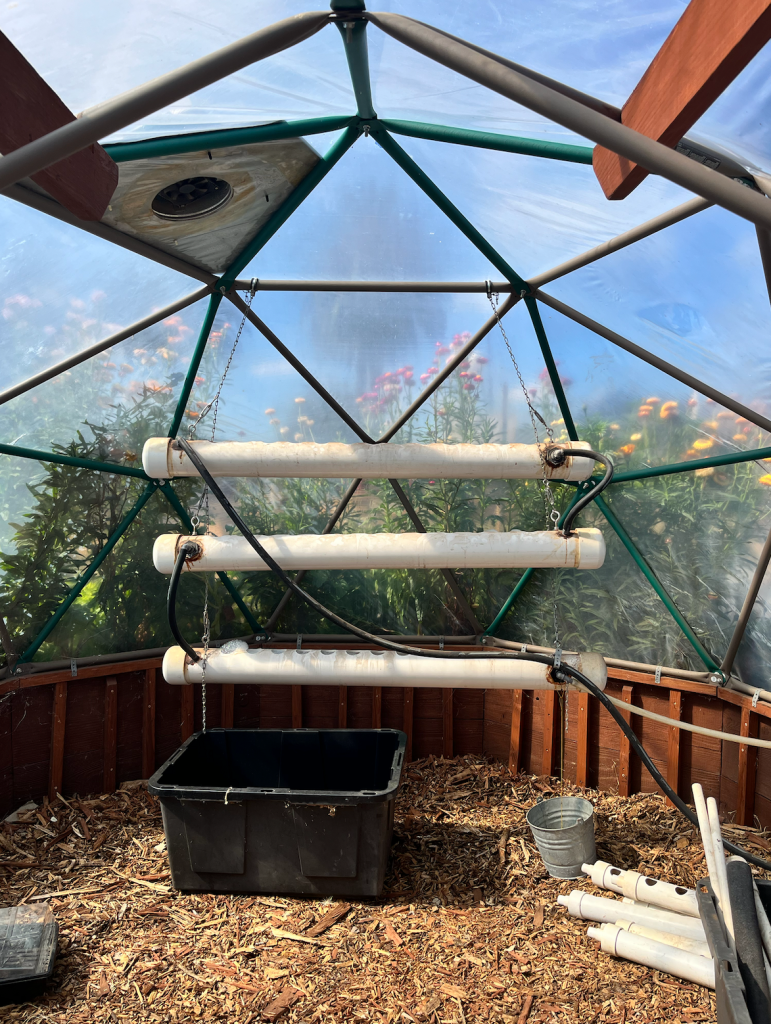
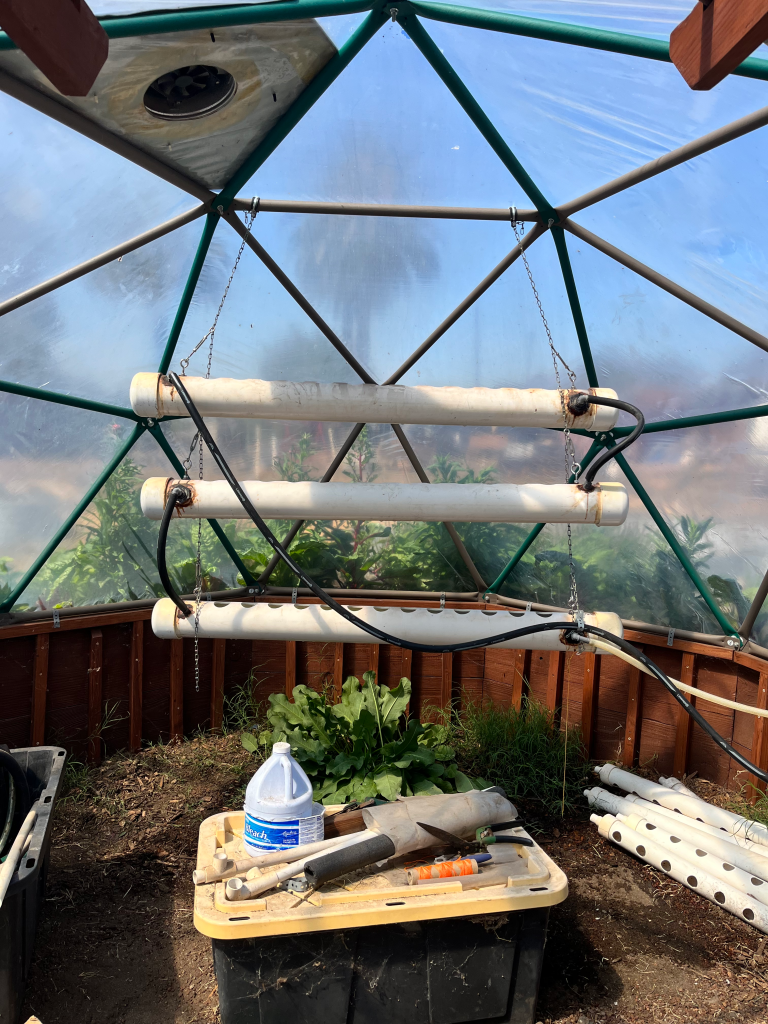
Next, and the most important part, the hydroponics system. After much trial and error, we got a working system that takes water from a container outside of the greenhouse, through 3 pipes inside the greenhouse and back outside to the container.

Lastly, since we wanted this greenhouse to be as self sufficient as it could, we didn’t want to rely on DC energy. Our solution to this was to mount a solar panel outside of the greenhouse to provide solar power to the pump during the day, and connect a battery to the solar panel to keep it running during the night. We found a pole we could use to mount the panel, but it was too short and we wanted the solar panel to be out of reach from people who tried to steal it. Jerry welded another pole to it to give it extra height and more metal pieces to make a frame for the panel to lie on. Once the pole was welded, we dug a hole around 4 feet in depth, inserted the pole inside of it, and filled the hole with concrete to keep it in place. Finally, we threaded the wires through the pole and under the greenhouse to come up into the water container for the hydroponics, where the battery and water pump will be.

Now that we have graduated high school, Kenric and I, Arin, will be leaving Climate Roots. This has been a long journey for us. Over the years we have learned skills that we never would have without this project. Working with an amazing group of people, we have accomplished so much and we are so proud of how the greenhouse stands today. But the work on the greenhouse isn’t over yet. Our new recruits Arjun and Pradyun will be taking our place and finishing the greenhouse to grow lettuce and other crops to be donated to our local food banks.

As always, keep calm and keep growing!

Sprouting Innovation: Our High-Tech Mushroom Farming Pilot Class 

We’re thrilled to announce the launch of our newest project at Climate Roots: a hands-on pilot class series where students will build their own small-scale, high-tech mushroom farms using Raspberry Pi and environmental sensors. This initiative brings together sustainable agriculture, programming, and environmental education—giving young people the tools to innovate for the planet’s future. 

Why Mushrooms? Why Now? 

This course is more than just fungi and fun—it’s about empowering youth with skills in agtech, a field critical to addressing the environmental challenges of tomorrow. Through this 4–6 class course (mix of online and in-person), participants will learn: 

  • How mushrooms grow and what conditions they need 
  • How to build a terrarium with humidity and temperature sensors 
  • How to program Raspberry Pi to automate the mushroom growth process 
  • How to store, organize, and analyze environmental data 

All while building a functioning mushroom farm prototype.  

Budget & Materials 

We’ve set aside a budget of $3000 for the pilot. A lot of the necessary materials have already been sourced, but the budget will cover: 

  • Additional Raspberry Pi units and sensor kits 
  • Cameras for growth capture 
  • Soil, mushroom spawn, and containers 
  • Outreach materials (flyers, posters, ads) 
  • Miscellaneous workshop supplies 

We’re confident this amount will be enough to run a high-impact pilot program, with minimal waste and maximum engagement. 

Class Breakdown 

Here’s how the pilot class is structured: 

Class 1 (In-Person): Introductions, project overview, Raspberry Pi basics, and setup 
Class 2 (In-Person): Installing pH, temperature, and humidity sensors; attaching camera module 
Class 3 (Online): Python programming for automation and data logging 
Class 4 (Online): Compiling sensor data and preparing the digital environment 
Class 5 (In-Person): Preparing the terrarium and planting mushroom spawn 
Class 6 (In-Person): Final presentations and reflection on tech, sustainability, and next steps 

Class Size: 6–10 students 
Locations: Mix of online and local in-person workshops (possibly local library or a maker space) 

Why Raspberry Pi? 

Yes, we’re aware of the current Raspberry Pi shortages. But here’s the deal: Raspberry Pi remains the most reliable and well-supported platform for this type of prototyping.  

The Bigger Picture 

This project isn’t just a one-time class—it’s a testbed for future Climate Roots programs. By piloting this course, we’re exploring a scalable method to introduce youth to environmental engineering and sustainable tech. Future courses could tie directly into larger initiatives, like building greenhouse domes or running school-based agtech programs. 

This effort also reflects the heart of Climate Roots’ mission: educating and empowering young people to take real action for the planet. It’s low-cost, high-impact, and deeply aligned with our values. 

Final Thoughts 

We’re excited to grow something real—literally and figuratively. From spore to sprout, we’ll be documenting every step of this journey. Stay tuned for updates, videos, and student stories as our mushrooms grow and so do we. Let’s build the future, one mushroom at a time. 

PS #27: Greenhouse Revamp

Meeting the Team Behind the Greenhouse 

Our journey began with a tour of the greenhouse, guided by the original creators, Arin, Avni, Emma, Kenrick and Zyanya. They walked us through their process of building the structure and shared insights into their timeline and vision. We also met Jerry, our mentor and a Board Member of the LEAF organization, who has been a constant presence and an incredible help as we carry out our work. 

Inspired by their passion and dedication, we committed to weekly Sunday work sessions to restore and improve the greenhouse step by step.  

The Team 

The greenhouse team is comprised of 3 people now: Me (Arjun), Pradyun, and Erika.  

First Steps: Cleaning and Maintenance 

In our first session, Pradyun and I (Arjun) focused on getting a handle on the overgrowth in the greenhouse. We weeded and cleaned the interior, giving special attention to the tub that holds the pump. We also removed all the damaged weed cloth inside the greenhouse, clearing the way for future improvements. 

Solar Connections and Gopher Protection 

During our next session, we turned our attention to powering the hydroponic system. A solar panel had already been installed, but it wasn’t yet connected to the rest of the system. We extended the solar panel wiring and learned valuable new skills in attaching and securing wires. After that, we installed fresh weed cloth in the pump area and added a layer of wire mesh to prevent gophers from digging through. 

Power System Challenges and Solutions 

With the solar panel in place, we focused on setting up a reliable power system. We built a custom shelf to safely house the battery. However, we soon realized the battery had only one socket for each wire—posing a challenge since both the solar panel and the pump needed to connect. To resolve this, we found the connector that allowed all components to work together. 

Getting the System Flowing 

When we first ran the pump, we hit a new hurdle: the system didn’t have enough power to move water all the way to the top of the hydroponic tubes. After some quick troubleshooting, we adapted by starting the water flow at the lower level of the system instead. With this change, we finally achieved consistent circulation and got the hydroponic setup working smoothly!